Concert Photography Lesson 6

裂缝 Crack
In the last lesson, we looked at how to shoot the drummer. Today, we will be looking at three different shots that are all related to each other: the hair flick, the jump, and the stomp. All three shots share the same mechanics, so we will cover them all in this lesson.
Suffocated
So, let’s look at some general settings and advice when trying to shoot all three shots. First off, you absolutely need a fast shutter speed. When I am going for one of these types of shots, I am always shooting with a shutter speed of 1/400 or faster. A slower shutter speed will give you motion blur, as these types of shots happen very quickly. Blur in any of these kinds of shots will usually mean you missed the shot.
Secondly, when shooting these shots, it takes some practice to get the timing right. Each shot needs to be taken at exactly the right moment to nail it. Shoot too early, and you missed it; shoot too late, and you missed it. Timing is everything. You could try and machine-gun the shots to get it, but that will only slow you down in your editing. Remember that you have to edit and deliver your images quickly, so you don’t have time to shoot thousands of images. Timing the shot is your best option.
The final thing you need is some research and luck.
Never before band playing at WOA
Before any performances that you can shoot, you should research the band and watch some of their live videos. You should be watching for hair flicks, jumps, and stomps. If they do any of these, try to remember which songs they do them in. Most bands will play from muscle memory; it is a well-rehearsed set that they perform each night, so you can predict when these shots will happen again.
萬重 Mega Soul
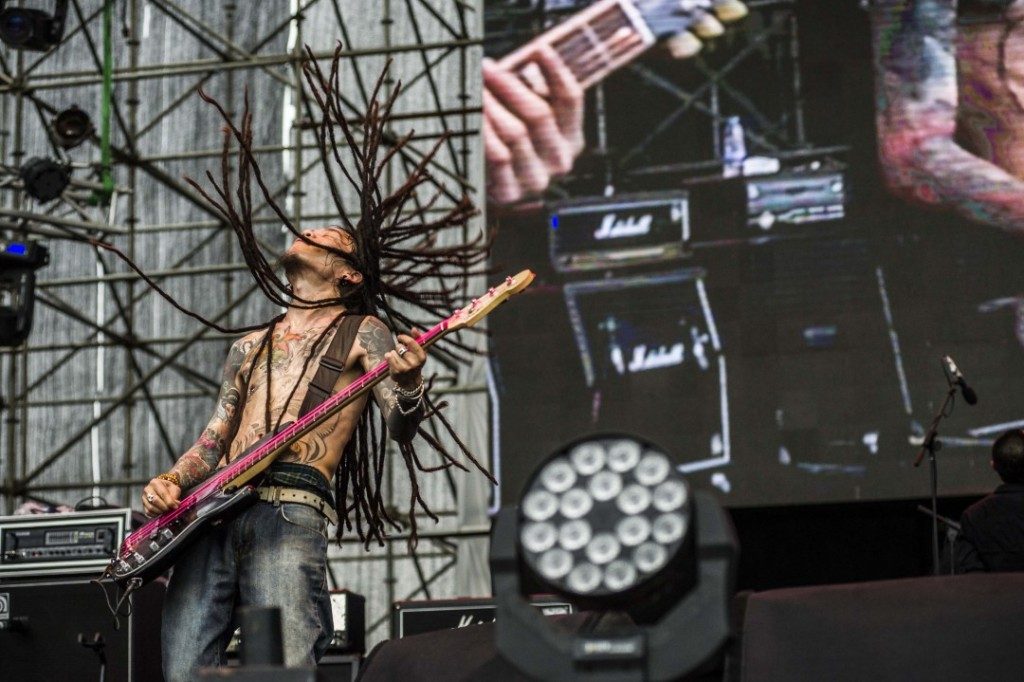
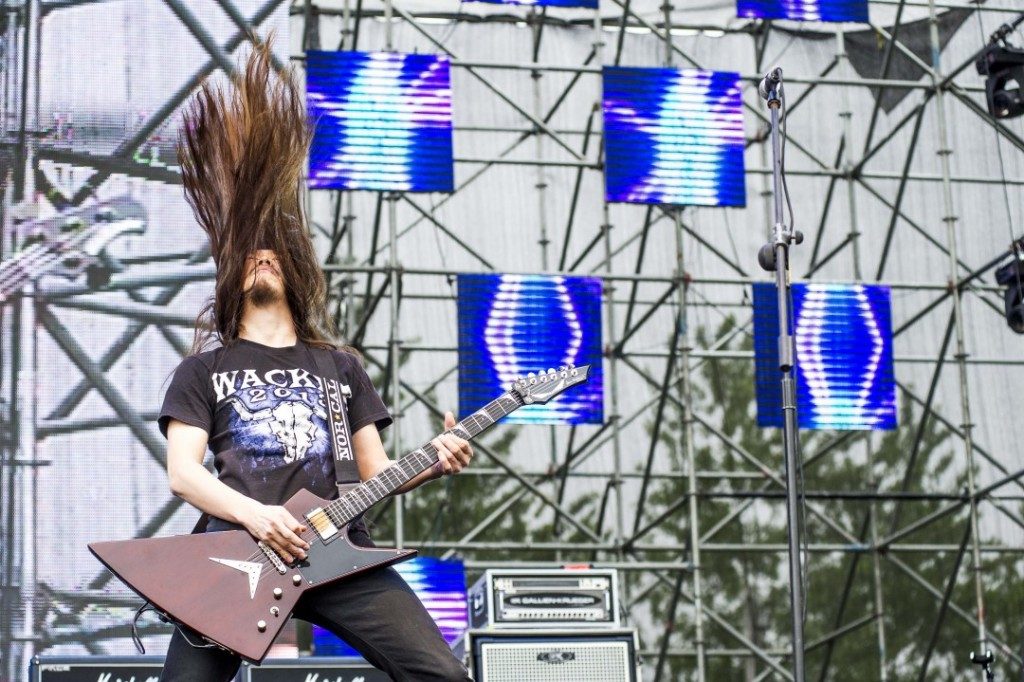
When shooting a show and looking for the hair flick, there are signs from the artist on stage that you can read to know they are about to do something. When shooting in the pit, even though you have your earplugs in, you need to listen to the music. The music will key you into when something is going to happen.
When the guitarist or bass players are jamming away in a song, they are not going to jump or stomp since they have to play, so you can rule out those shots. However, they can and will hair flick if they have long hair. The key to spotting a hair flick is watching their bodies and heads. If they are close to the microphone, then nothing will happen, as their hair will hit the microphone in a flick, so you can relax.
Before they do a hair flick, they will always move a step or two backward from the microphone or a step to the left or right. These movements can be hard to spot because most musicians move around a lot on stage, so you must always watch their distance from the microphone.
The second key aspect is that they will dip their heads as if they are looking down and will try to get all their hair in front of the guitar. You usually have some time to prepare for the flick. Once you see the head is down and the hair is dangling in front of the guitar, you know the flick is coming.
裂缝 Crack
Once their head is down and their hair is hanging, focus on their stomach or chest. Don’t focus on their head, as it will move very quickly and your autofocus may follow their hair. If your depth of field is shallow, their face may be out of focus. So, focus on their chest or stomach and get ready. Let them play, and wait for them to make an aggressive movement down with their head. This aggressive movement is the indicator to shoot. If you shoot as you see the head dip down aggressively, you should nail the shot as the hair reaches its apex in the flick.
I never machine gun these shots; I just wait for the aggressive head movement down and take a single click. Ninety-nine percent of the time, I get the shot. This is the one shot where you don’t have to worry too much about the eyes, as they will almost always be closed in this kind of shot. It takes a little practice, but if you shoot rock or metal bands, you will get many opportunities to perfect the timing.
Make sure when you are composing the shot that you leave plenty of headroom to avoid cropping the hair. The longer the artist’s hair, the more headroom you need to leave in your image composition.
窒息乐队 suffocated
To get the best hair flicks at night, you want to try and line up the stage lights to catch the hair as it flies in the air. However, this is not very easy to do, as you are basically guessing where the hair will go, and it will take a lot of trial and error to get it right.
Toss band
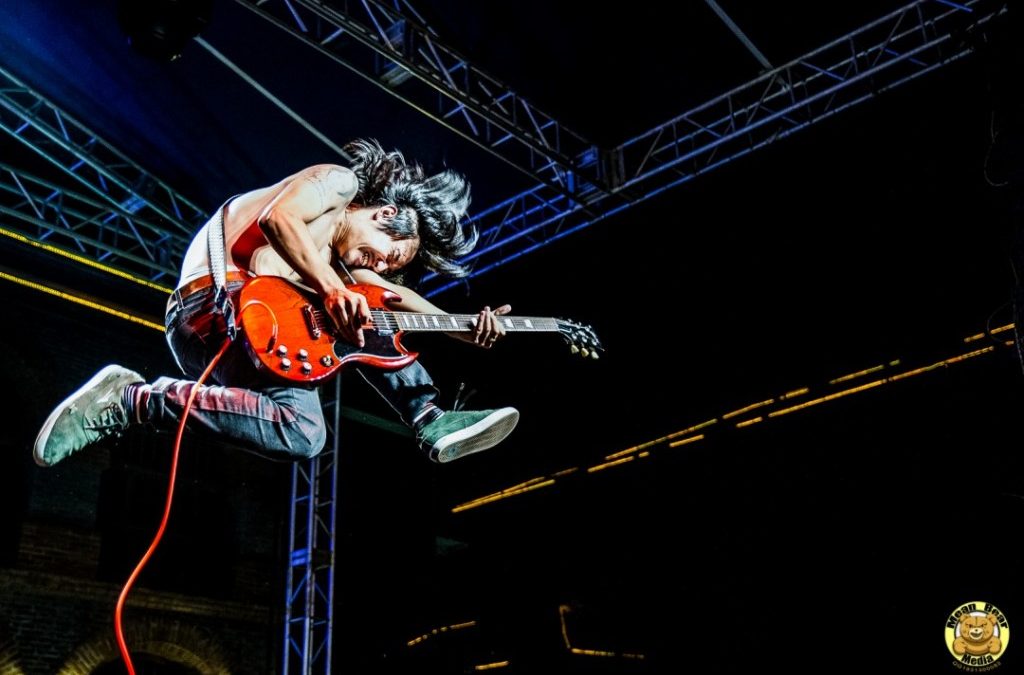
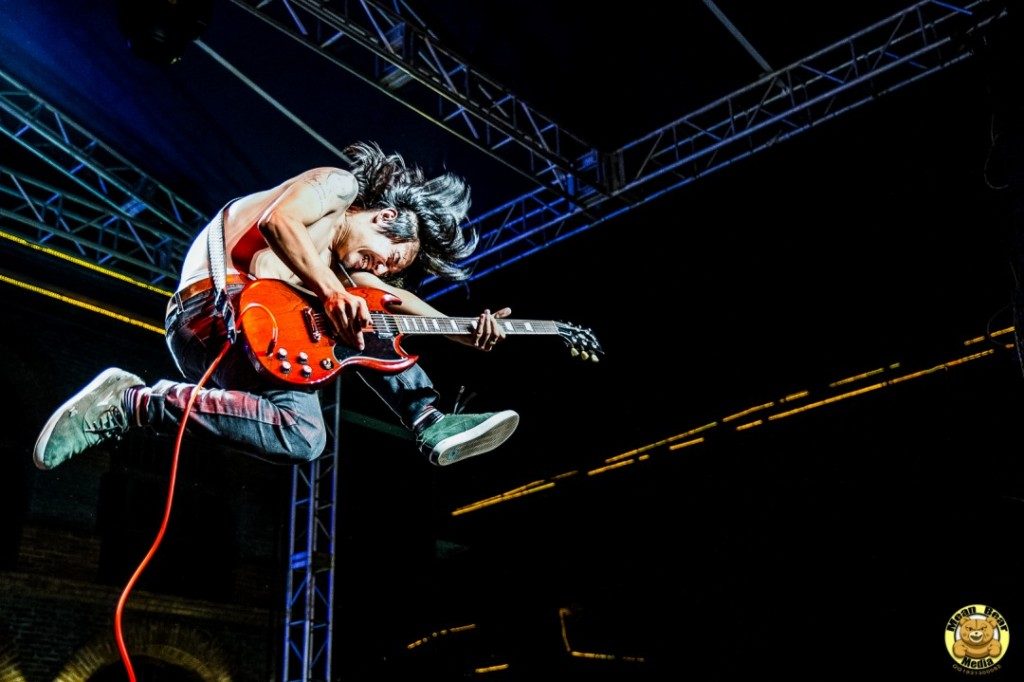
Next up, we will look at jump shots. All music photographers love the jump shot; it is almost the holy grail of music photography, and many of us chase the perfect shot. But once you get used to shooting jump shots, it is really not that difficult. Your position in the pit is critical when shooting this shot. You want to be on either the left-hand or right-hand side of the artist you are shooting. You don’t want to be straight on to the artist unless you are shooting the lead singer and he has no musical instrument.
During this type of shot, you want to do your utmost to avoid the microphone stand in the frame because it will more than likely hide the artist’s face or be distracting, causing your shot to fail. Remember that the microphone is your enemy in this shot. You have to hide the microphone to make this shot work.
annalynn
The key to shooting this shot is understanding that most musicians only jump during a break in playing. Usually, the music will build to a peak, and as it reaches that peak, they will jump. The break in which they jump is very short, less than one second, but once you have been shooting a lot of shows, you will be able to tell when a musician can jump and when they cannot.
Always remember that when they are deep into a song and really jamming away on their guitar, they cannot jump—they are too busy. It is always at a time when they stop playing that the jump can happen. Doing research on a band and listening to their music helps a lot with this shot. If you can watch a video of their live performance, you will know which songs the musicians like to jump in, and you can watch out for those moments.
左右乐队
Now, once you have the composition right for the shot, the next thing you need to think about is the timing. You want to take the shot right at the peak of the jump, if possible. If you shoot the shot a little late, the feet will look like they are coming down. Look at the photo above: I was late on the shot, and his feet are already coming down in the photo. The impact of the shot would have been much better if I had gotten the shot a split second earlier.
The way to time the shot is by watching the artist’s body and their body language. Almost no artist will just jump; they will always have a pre-hop, if I can call it that. They will first have a light bounce or a bending of the knees and then a small squat down to generate height for the jump. So the jump is really a two-movement shot, and you want to use both movements to get your shot.
When you see the first pre-movement, or the pre-hop as I call it, you want to focus on their stomach or chest. You want your focus locked in, and as the artist goes down for the second movement and into the squat, you want to fire the shot as soon as their feet leave the ground. This all happens very quickly, so you need to be able to get focus and shoot in less than one second. The time from the pre-hop until the peak of the jump happens in the blink of an eye.
This is one shot that takes a lot of practice to get right, but once you are comfortable shooting it, it becomes remarkably easy. You learn to take the shot on instinct. You can feel when the music is right for the jump, set up, get your focus, and wait for the feet to leave the ground, hoping you nailed the timing.
Now, you could use the motor drive and shoot 20 or 30 frames to get the perfect timing, but that is 20 or 30 frames you have to scan through later when editing, and you might not have time for that. Shoot fast and shoot smart.
![]()
Shooting the stomp is exactly the same as shooting the jump shot. The mechanics of the shot work exactly the same way. Most stomp shots happen as the music peaks and the musician is about to stop playing for a millisecond. Instead of jumping, they perform a stomp. There is nothing else really different from shooting this compared to the jump shot.
Just make sure you have an angle clear of the microphone and watch your composition. When an artist stomps, they will do it in one direction and can cover a lot of distance in that split second. So, make sure you leave enough room in your shot so that you do not crop off their foot. If you crop the foot in the air, you don’t have a shot.
FinalMessage乐队
My final advice for shooting these kinds of shots is that they don’t tend to sell well to traditional media outlets. Most of them want the basic 3/4 length portraits of the musicians on stage. However, online galleries and social media love these kinds of shots. So remember that when you are shooting. They are fun to get, it’s like hunting, and it can be addictive chasing these shots at each show, but they will seldom pay the bills. Remember to cover your basic shots first before you go hunting for these types of shots.
Timing is everything when it comes to music photography, and managing your shooting time in the pit is also critical. You only have a short amount of time to shoot in most cases, so choose how you use your time wisely. If you nail one great jump shot but have nothing else for your publication to print, then you will most likely lose your gig with that media outlet. So shoot smart. Our field is extremely competitive, and there will be 100 photographers waiting to take your place in the pit if you mess up.
That is all for this week. We have been talking a lot about what you should do in the pit, so I thought next week we would discuss pit etiquette and what not to do while shooting.
So until next week, happy shooting.
Shaun.