Concert Photography Lesson 5
Never forget about the drummer.
Welcome to the 5 lessons in concert photography! Today, we are going to look at the almighty drummer. Shooting the drummer is one of the most overlooked shots in music photography, and we will explore the how and why of capturing them.
Drummers are usually the coolest and most down-to-earth people in the band. I have shot hundreds of bands, and I have only ever met one drummer who was a jerk. Drummers are the guys you want to make friends within a band.
Starting off from this lesson, we will be looking at a single type of shot in each lesson and how to shoot it. In previous lessons, we focused on the technical aspects of shooting complete shows, exposure control, composition, and workflow, but those lessons were rather long and time-consuming to create. The future lessons will be more compact and focused on one aspect at a time.
Drummer shots are all about timing and exposure control.
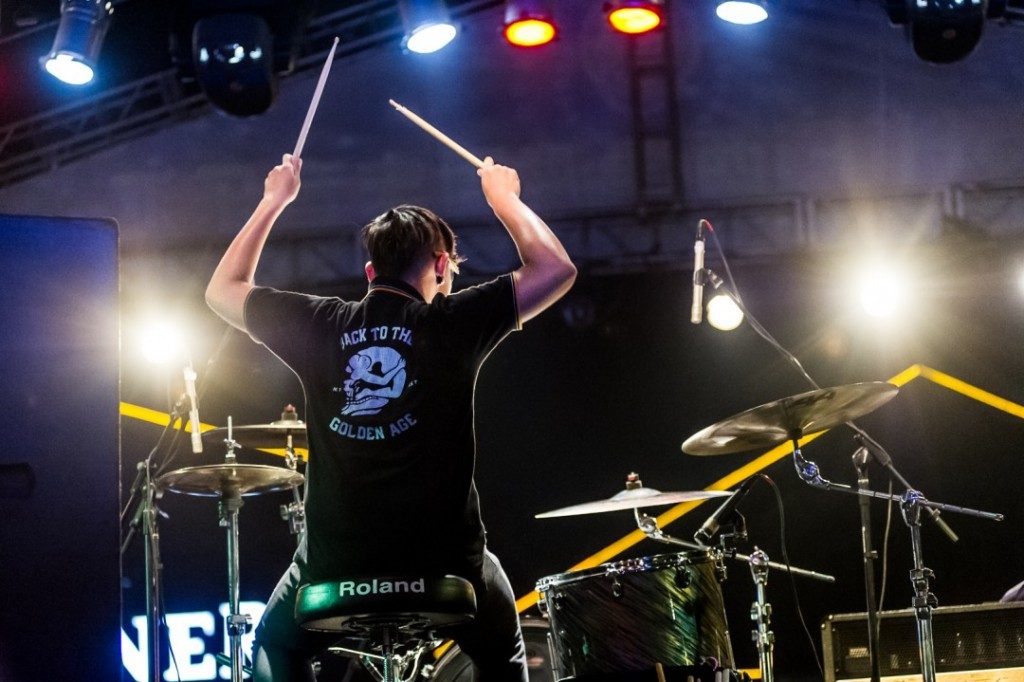
Let’s have a look at why many photographers skip the drummer at a show. The drummer is usually situated at the back of the stage, normally in the center, behind the lead singer, making them hard to shoot from head-on. You could try to shoot the drummer from the left or right of the stage, but you might be obstructed by the bass or guitar player. Adding more misery to the situation, the drummer’s cymbals may be blocking his face as well, so getting a clean shot is very difficult at times. But it gets even worse because usually, the drummer will have terrible lighting on him—anywhere from 1 to 2 stops lower than the people in front of the stage. Shooting the drummer can be a total nightmare for photographers—very time-consuming—and if you only have three songs to shoot, many photographers may decide to skip the drummer and concentrate on the easier targets in front of them.
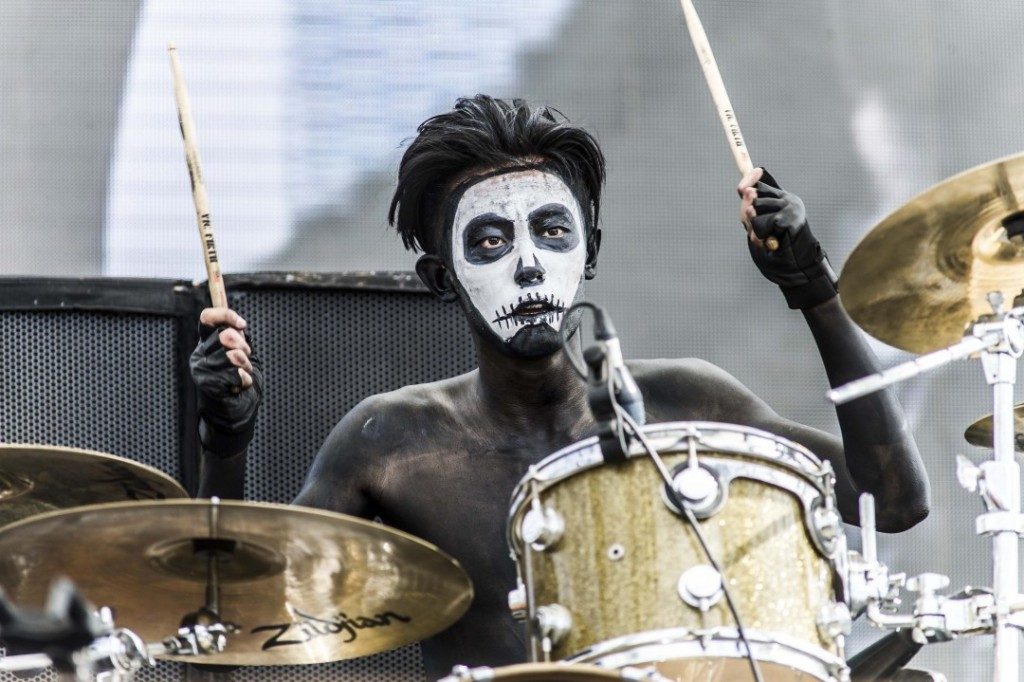
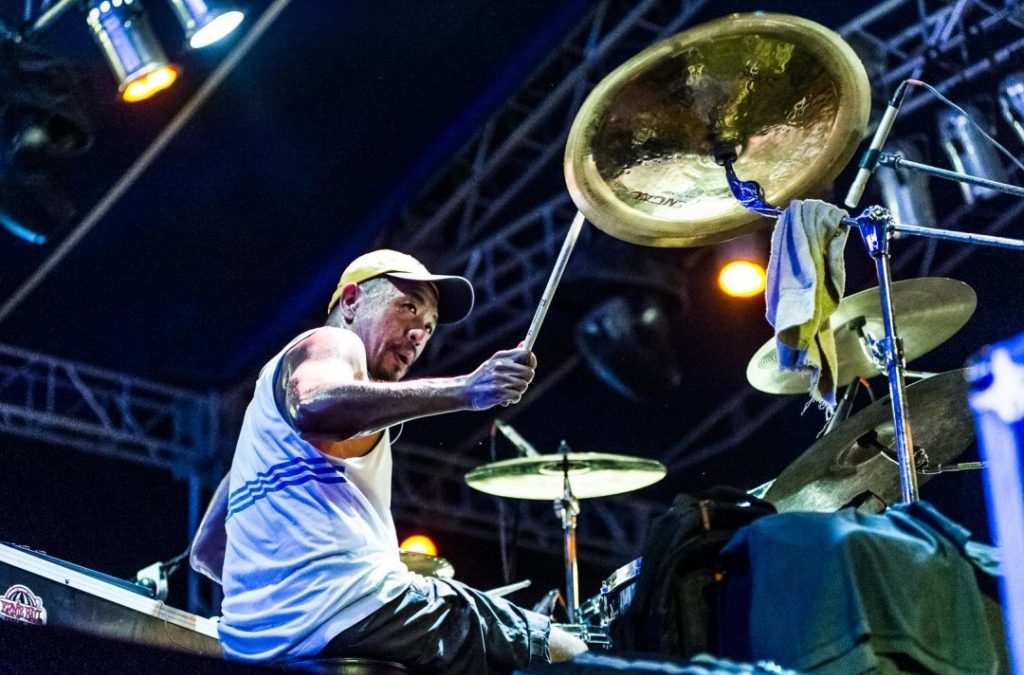
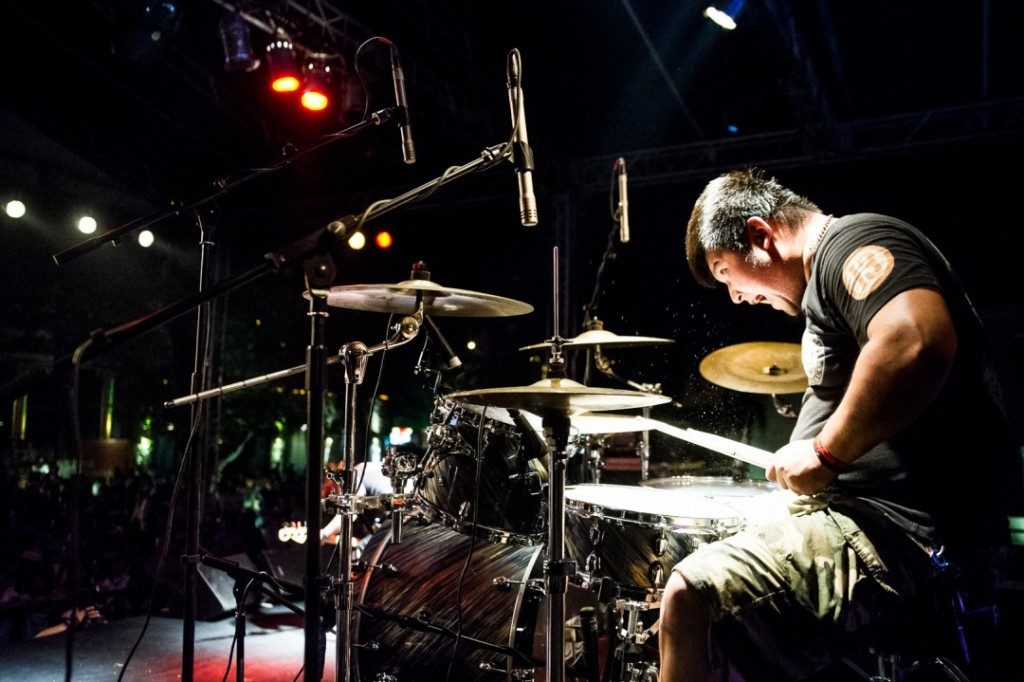
永恒之翼 drummer
So this is how I shoot the drummers. Maybe it is not the perfect way, but it is the system that I have found works for me over the years. Let’s start with the shutter speed needed to shoot drummers. Again, this differs depending on the types of bands you will shoot, but as a rule of thumb, I like to keep my shutter speed at around 1/640. This should be fast enough to freeze most drummers. Never underestimate how quickly a drummer can move. If you shoot them with a shutter speed of 1/320, I can guarantee you will get motion blur in your shots. So, the shutter speed should always be quick. That is easy to remember, but what about the exposure?
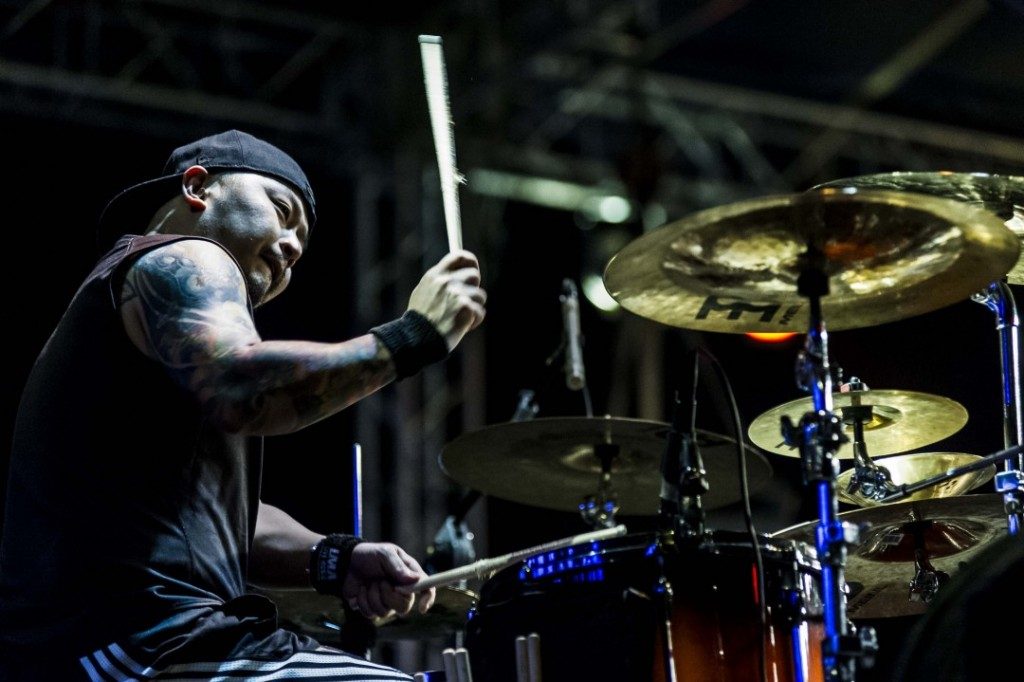
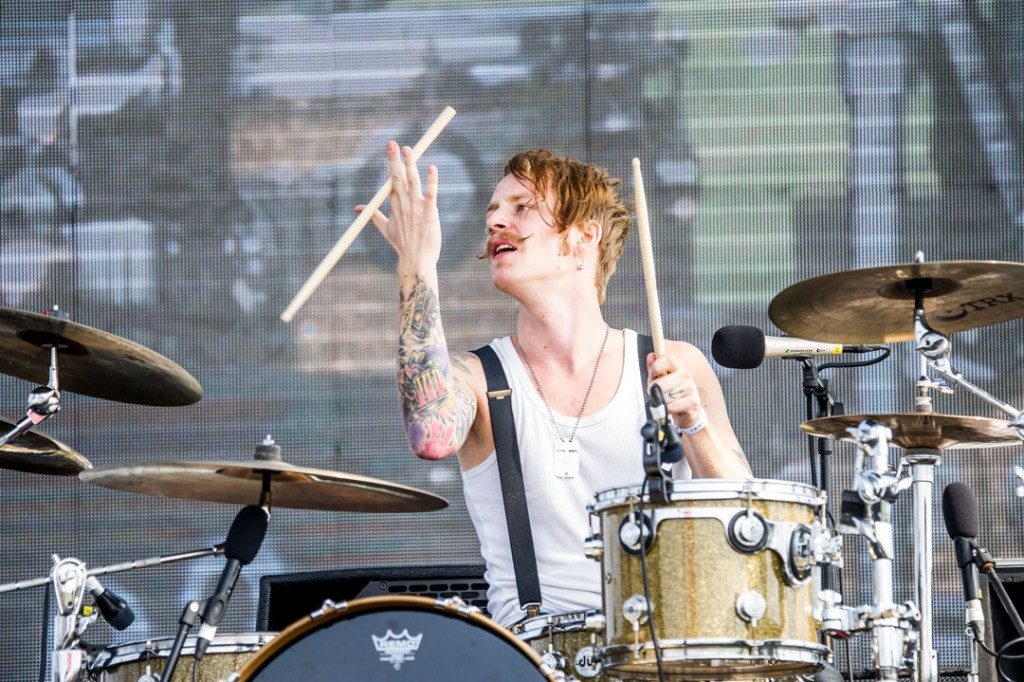
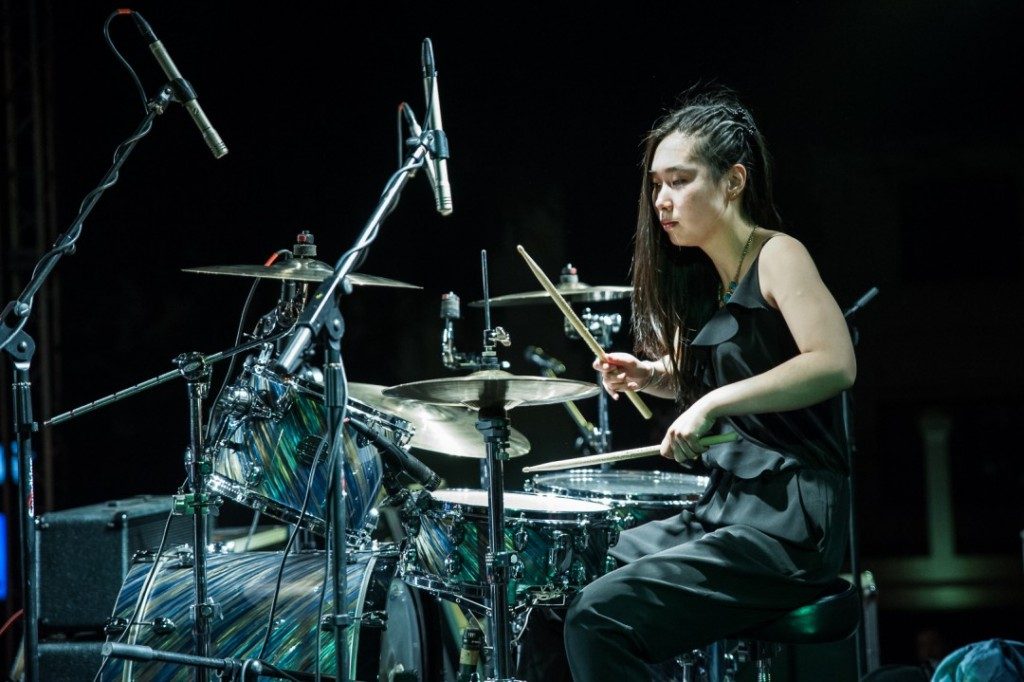
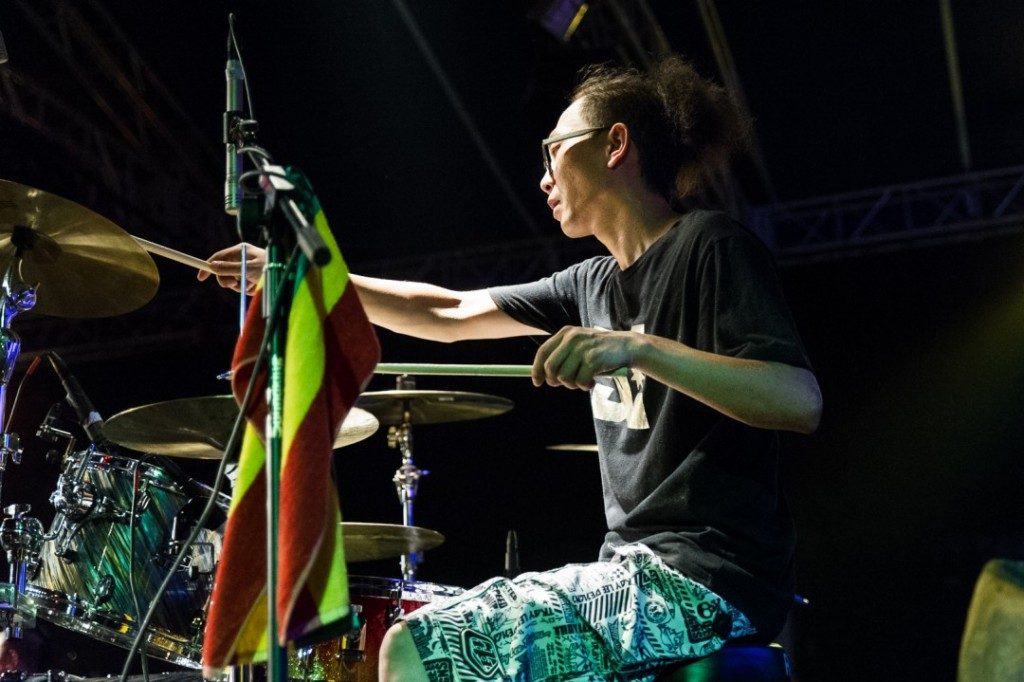
窒息乐队
If you are shooting in the daytime, it is easy. Just remember that even in the daytime, the drummer is at the back of the stage and will still be about half a stop darker in exposure than the performers at the front of the stage. So, make adjustments to your exposure for that. Light is not your friend when shooting a show at night. If you are shooting a performer at the front of the stage at ISO 4000, you will need to go one or two stops higher for the drummer to compensate for the lack of light reaching him and for the increase in shutter speed that you will need to shoot him.
Continuing with the example of shooting a guitarist at ISO 4000 and a shutter speed of 1/320, at most shows, you would need to gain one stop of light for the drummer and additional light for the increase in shutter speed. So, you would have to increase your ISO to compensate for one and a half stops or two full stops of light, which would mean your ISO would be between 8000 to 10000.
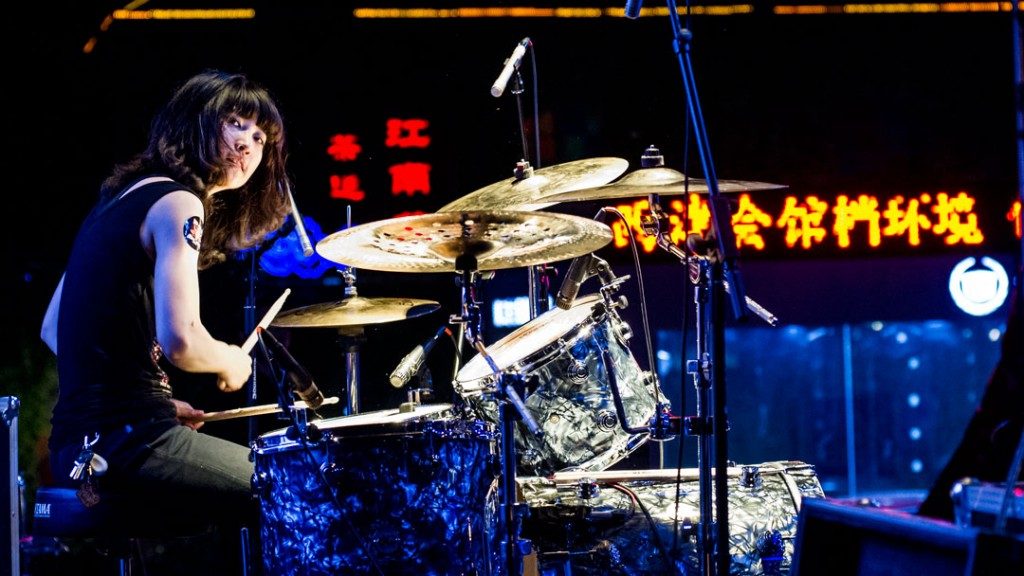
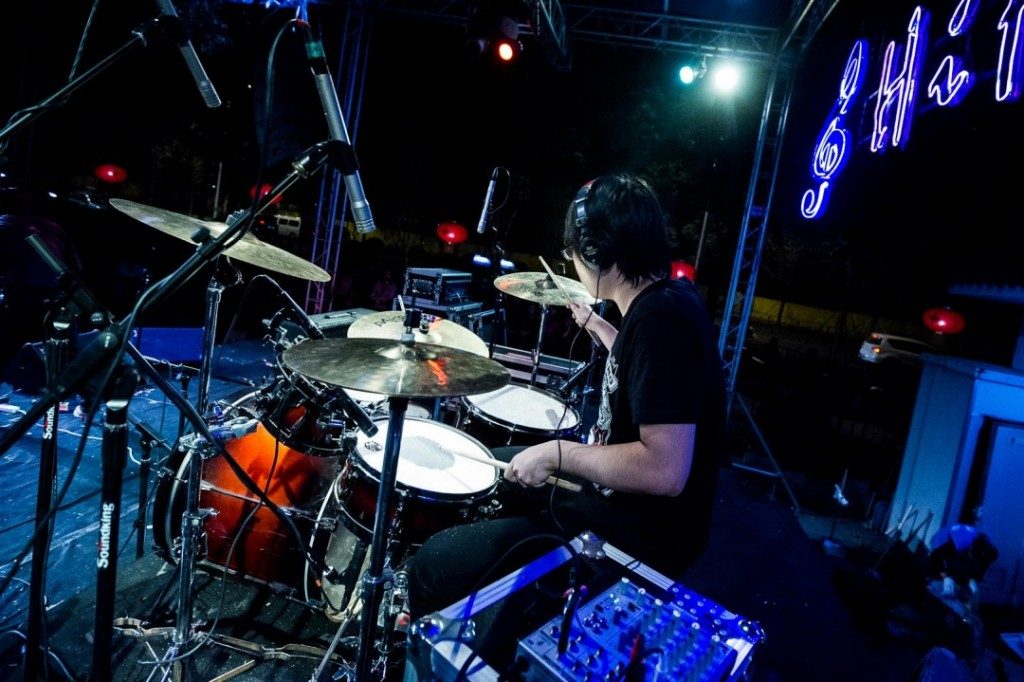
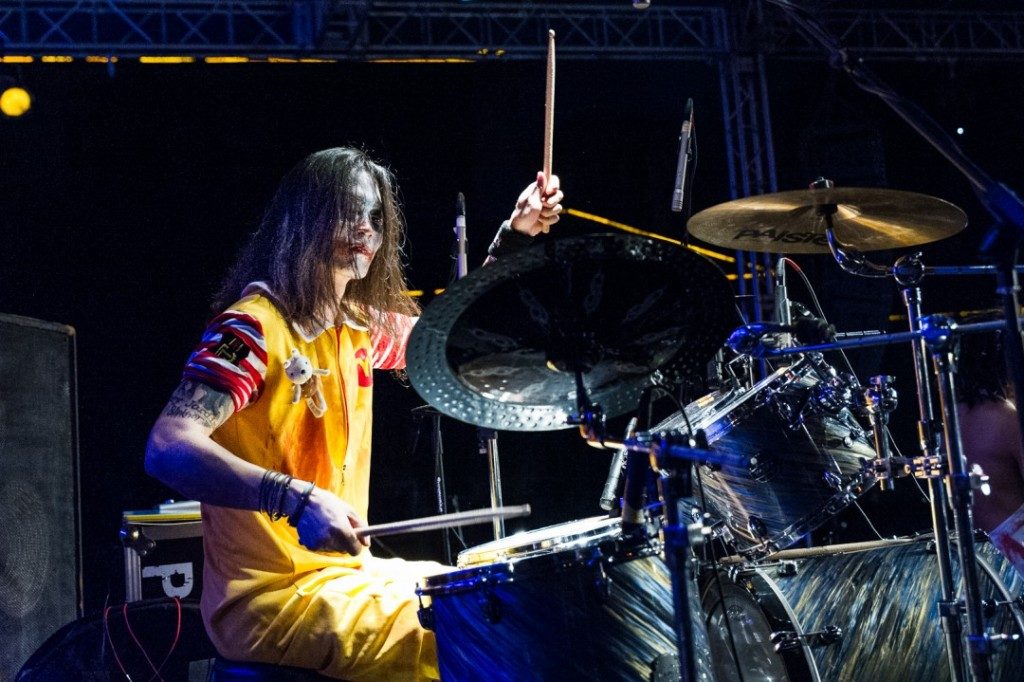
Noisy images are a problem for us at high ISO. This is one of the most noisy images that I could find that was still published.
But for some cameras, this can make photos very noisy, and my assistants keep telling me that this is true. You have to understand how noise works on a digital camera. On most digital cameras, the noise is most prominent in the dark and out-of-focus areas of a shot. The in-focus and well-exposed areas of a photo don’t have much noise. The key to shooting at high ISO is that you have to nail your exposure. You cannot be off, or if you are off in any way, it is better to be slightly overexposed than underexposed. You can always recover a little from an overexposed image at high ISO, but you cannot recover much detail from an underexposed shot. A rule of thumb for shooting at high ISO would be that you can drop the exposure down by half a stop and be fine, but you cannot go up by more than 1/10 of a stop without completely destroying the image with noise.
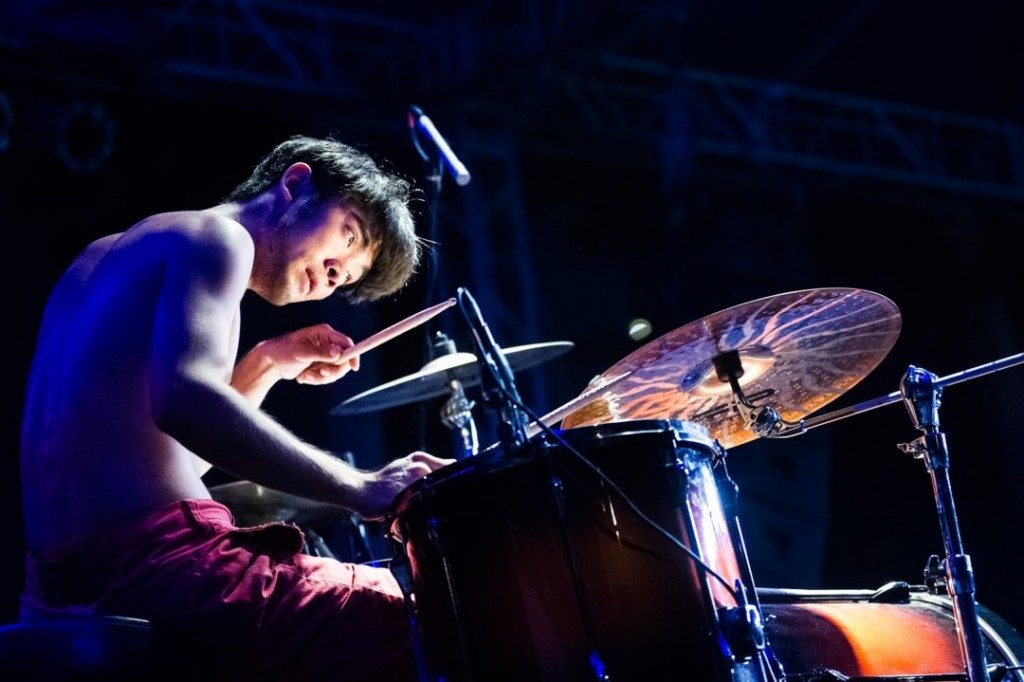
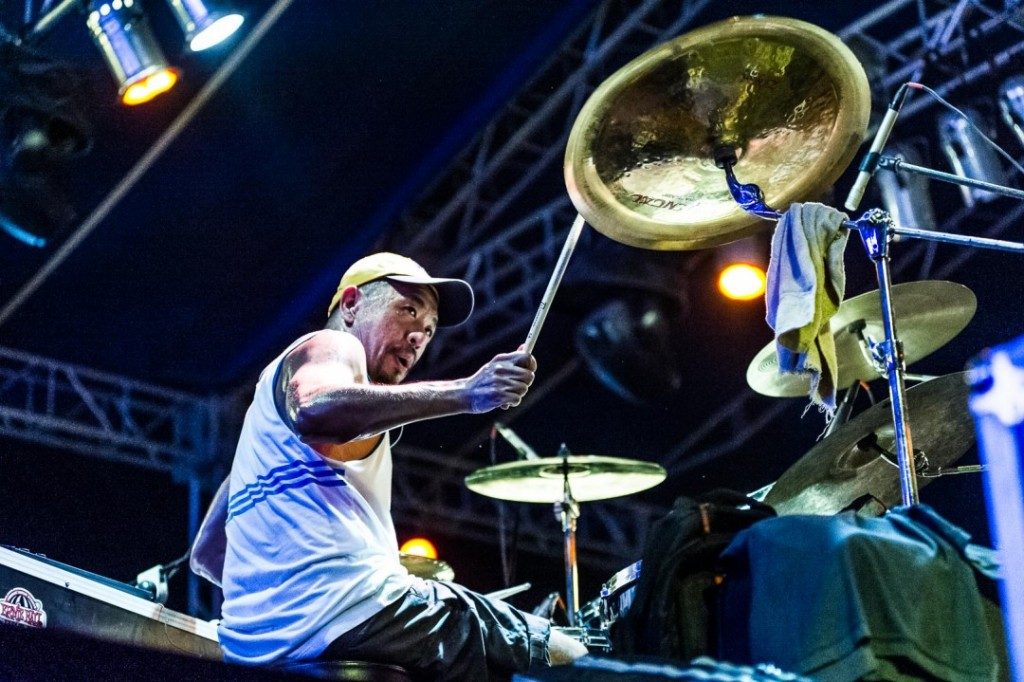
DayDream乐队
The shot above was taken at ISO 12500 on my Nikon D3s. That is the absolute limit I would shoot with that camera at, but I knew that if I nailed the exposure, the noise would not be a problem. However, if I was off even just a little, the noise would be terrible. I always give my assistants this advice when shooting at higher ISO: the higher the ISO, the less margin for error.
Even a noisy photo is not the end of the world. I have had very noisy photos of drummers before, and once I had the photo printed, most of the noise was gone. I have handed in many photos to my photo editor that were shot at high ISO on my old Nikon D700, but my editors still used the photo because they don’t pixel-peep at 100%. They view the image and decide if it is usable or not. Pixel-peeping is for photographers only. It is a bad habit that you need to break if you want to make progress in this industry.
The only time you should ever be at 100% zoom on any photo is when you are doing serious editing and manipulation of the photo. So, don’t fear the grain; embrace the higher ISO as a tool you can use in your photography.

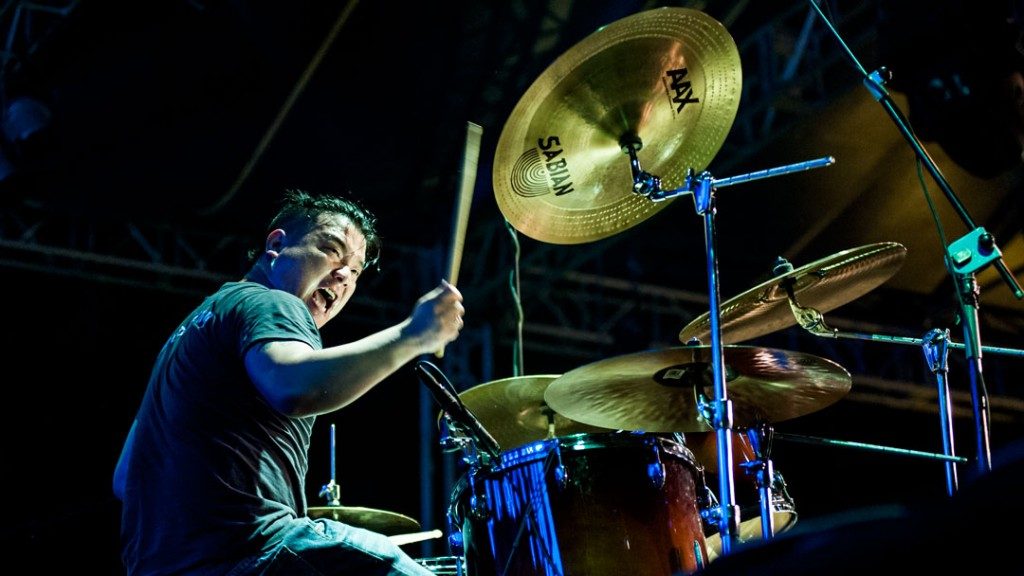
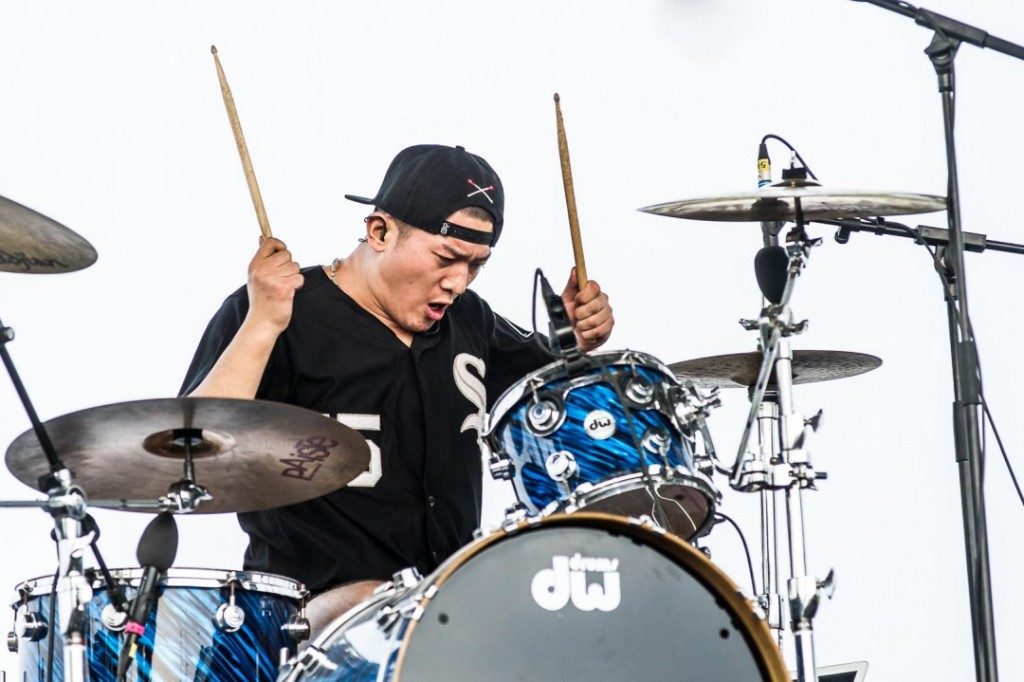
ANTAGONIST ZERO
Once you’ve mastered the exposure portion of shooting drummers, next up is the composition and trying to get clean shots of the drummer. I consider there to be 9 to 10 different possible shots of a drummer. The first shot is the dead center shot. As I mentioned before, the drummer is usually behind the lead singer, so you have to find a way to get a clear shot. This is where your zoom lens is your friend. The best way I have found to shoot the drummer is to zoom right past the lead singer’s legs and wait for their legs to move out of the shot. Now, depending on the size of the stage, a 200mm lens might not be enough. You have to work within the limits of your equipment and make the most out of it.
Monkey Legion 乐队
波澜壮阔的童话乐队
The next 6 shots depend entirely on how much stage access you have and how much freedom the stage manager will give you. I always try to get to both sides of the stage and shoot the side shot of the drummer. These shots are great because you can capture some excellent facial expressions from the drummer. Timing the shot is the difficult part. You should try to get the shot while the drummer’s arms are coming down. I usually wait until I think the drummer’s arms are on the upswing and then click away. This is the only time I will fire off a couple of shots, as the drummers move so quickly on stage, and you don’t want to get a shot of the drummer with their eyes closed. Always remember, if you cannot see their eyes, you have no shot.

Cypher 16
Now, if you can get on stage, the next shot takes some practice but can be really cool. You have to use the widest lens you have on your camera and get right up close to the drummer—so close that he could hit you if he wanted to. Then, you shoot from there.
死于情人节乐队

梧桐乐队
Even if the stage manager is cool with you being on stage, always clear it with the band as well. While they are playing, it is their stage and their rules. If they say no, then don’t go on stage. It is as simple as that. Always respect the artist and the people who are paying for the show. As photographers, we are not there to be in the show; we are simply there to capture it to the best of our ability.
Sweet甜乐队
Now, if you are this close to the drummer, the next shot I like to go for is the over-the-head shot. What I do is unclip my camera from my BlackRapid camera strap, get into position just behind the drummer, and pre-focus my lens, making sure that the exposure is set right since you only get one shot at this. Once everything is set up, as the drummer is in a position I like, I will stand up quickly with the camera above my head, as high as possible, pointing down towards the drummer, and I will fire off a shot blind. I have the lens set to its widest possible focal range, around 15mm. If the shot goes right, it should capture the entire drummer with all his gear and part of the stage.
圣殿骑士乐队 I have shot so many of these shots but this is the only one I can find now. Once I have found a better example, I will swap this photo out for it.
The next type of composition you can try is if you have access to backstage, then you can shoot from the back left or right of the drummer, but from below, so you are shooting up towards them. I love this type of shot and go for it at every single show that I shoot. Just remember to keep the fast shutter speeds.
无有乐队
The last type of composition that I have been shooting lately involves getting backstage, but instead of shooting from one of the sides, I shoot straight onto the drummer. This shot is a little more tricky, though, because you will have all the stage lights pointed directly at your lens. So, you need to drop your ISO a lot. If I am shooting at ISO 8000 for the side shot at the back of the stage, then for this shot, I would drop my ISO to around 2000. Now, this is only a rough guess, as each stage you shoot at will be different, so you will have to judge this using your own eyes. Your camera meters will be useless for this. All those bright stage lights will throw the meter completely off.
雪人先生Snowman
I use this shot a lot here in China, particularly if the drummer does not look the part. I shoot a lot of metal bands, but for some reason, many of the bands have drummers who look very geeky, which ruins the image of the band. This shot helps hide the drummer’s appearance if he does not really suit the band’s image too much.
幻-凡尘乐队
There is one last type of composition that you can try, but I have never done it because I don’t have a fisheye lens. I have seen other photographers do this, and it looks good. You need stage access for this shot. If you have that access, use your fisheye lens and camera on a monopod, set up a remote trigger with the camera, and lift the camera high above the drummer using the monopod. Then, shoot down on the drummer and include the whole stage. These shots can be amazing, but I don’t want to buy a lens just for one type of shot, especially since the Nikon 16mm fisheye lens is not highly rated and many people say it is soft. I cannot post an example of this type of shot as those images belong to other photographers. However, you can look at the work of Adam Elmakias to see this shot used a lot by him.
画皮乐队
I started this lesson by saying how much I love shooting drummers, and I will end the lesson by saying, never forget them. They often get forgotten by photographers, but if you can give them some images, they will be grateful, and they are usually the easiest person in the band to make friends with. I have gotten a lot of passes for shows over the years from drummers. The music world is small, and everybody knows someone who could sort you out with a pass. So never forget them and treat them well. That is it for this week’s lesson. Next week, we will look at the hair flick shot that is popular with rock and metal bands.
So until next week, happy shooting.
Shaun.