
Concert Photography Lesson 3

In the last two lessons, we looked at the gear used to shoot a concert and the basics of composition. In today’s lesson, we will focus on the most important aspect: the art of exposure and how to control it during a show. Shooting a concert or a live music show is all about controlling your exposure using your eye. Your camera’s internal meter will have great difficulty getting a correct exposure because of the bright spotlights in the background and the consistent flashing of the lights. If you shoot in any of the automatic modes, you will get a lot of overexposed or underexposed images—some of them will be off by as much as three full stops of light or more.
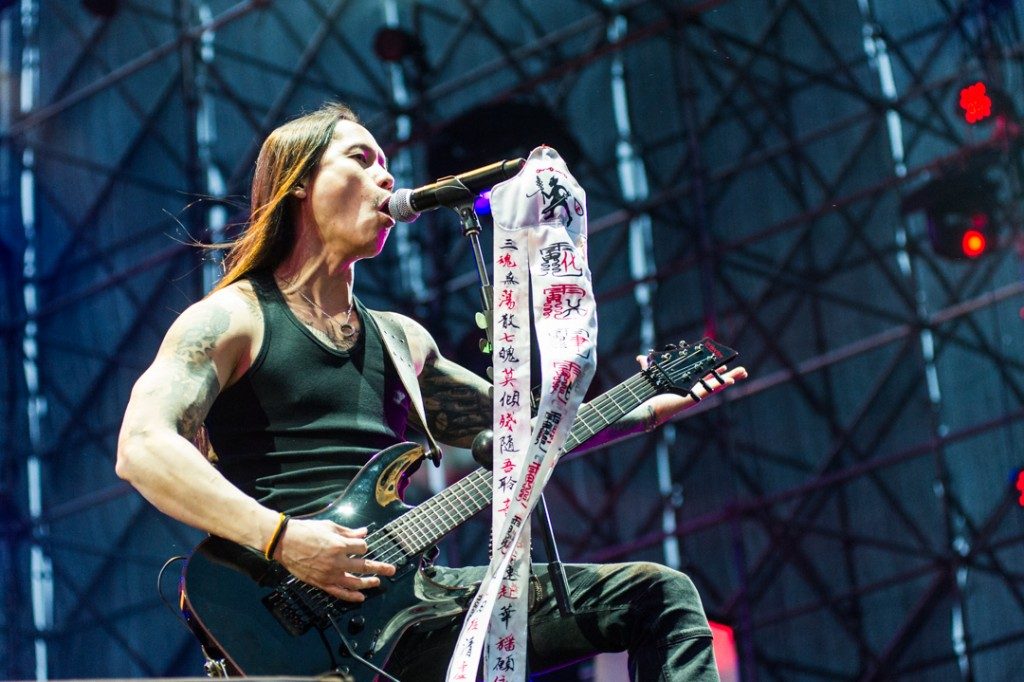
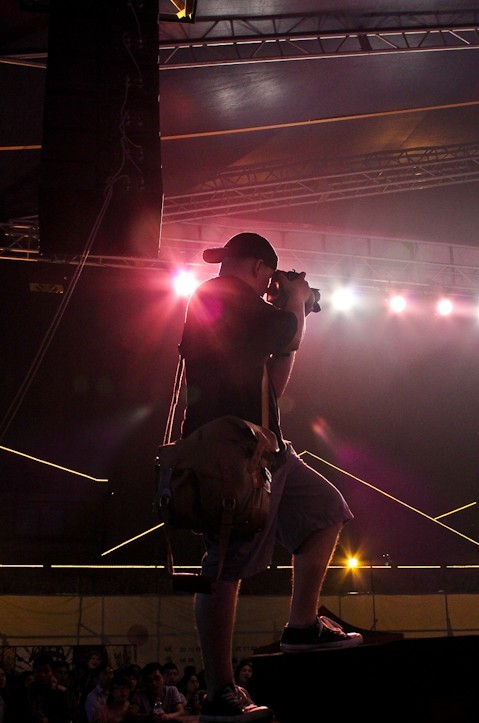
evocation招魂 Maintaining good exposure during a shoot is critical to fast workflow.
There are some basic rules to help set up and maintain the correct exposure during a shoot. We will be looking at the different aspects of setting up the exposure, maintaining the correct exposure, and how to deal with difficult lighting situations.
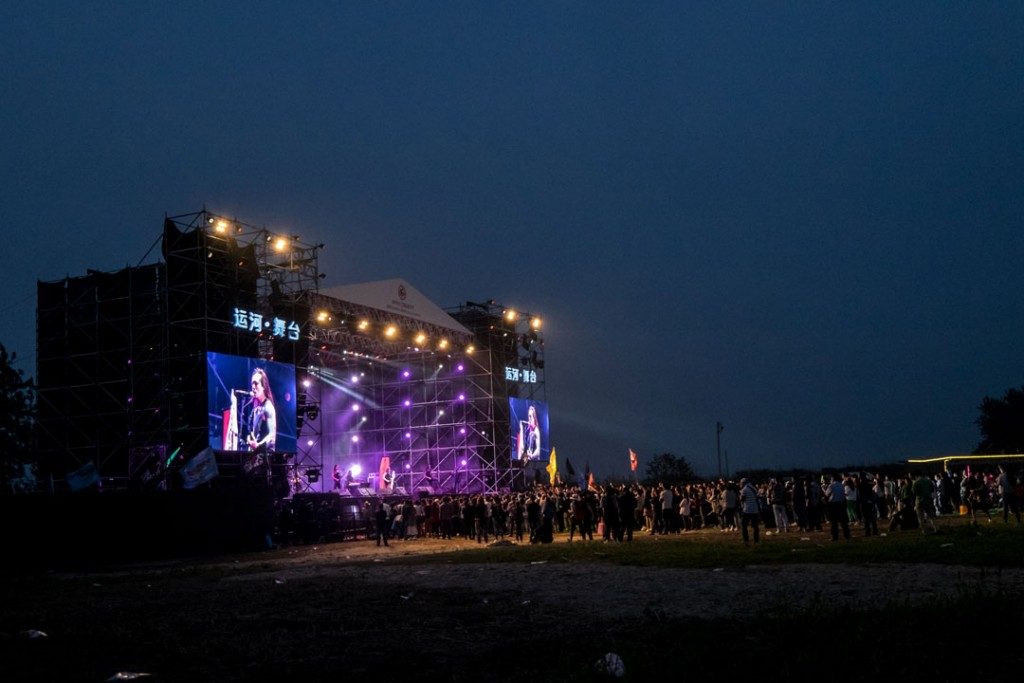
Evocation on stage at Changjiang Music Festival. Each stage that you will shoot will have a different light setup. I you got to learn how to set up your cameras quickly.
Generally speaking, the big famous bands will have great lighting, while the smaller, lesser-known bands will often have terrible lighting to deal with. This can be frustrating, but it means that the bigger and more famous bands are easier to shoot, whereas the smaller bands, which are easier to get access to, are more difficult to shoot.
Nile Rodgers. Such an easy shot with great lighting throughout the show.
But it does not matter if the lighting is great or terrible. Once you are comfortable shooting a show manually, getting the correct exposure is no problem.

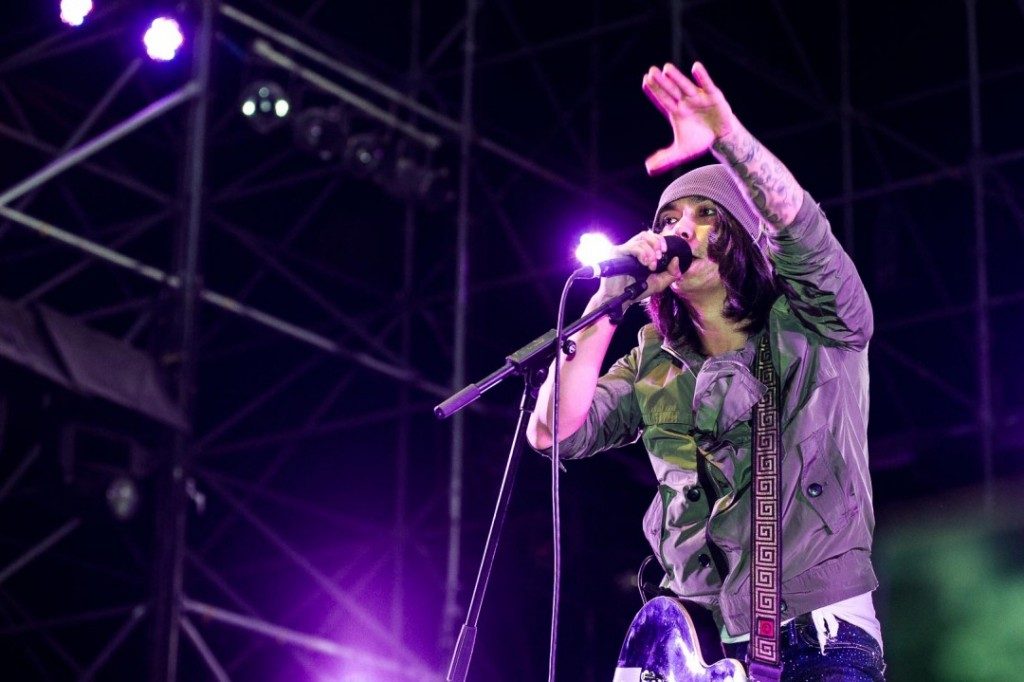
David James Hoffman & Yampapaya Tribe. David Hoffman is famous in China but shooting his shows is a nightmare, he mixes LED lights with stage lights and never has any front lights. The only light you are getting on his face is bouncing back off the stage and hitting his face. Difficult to shoot.
When it is showtime, the first thing you should do is get your pass and meet the security. After that, try to get into the pit and inspect the lights so you know what you are dealing with. I always try to get to a show a few hours early so I have time to meet people and check out the lights. If you can meet the lighting guy, that’s even better, but sometimes they are really busy and don’t have time to talk to a photographer. Once you have seen the stage and the lighting setup, it is time to set up your camera for the show. For each show, there are some things that you should always do.
Step 1: Set up the camera to use the correct autofocus system.
Step 2: Set the camera to manual mode.
Step 3: Set the correct white balance.
Step 4: The Rule of 4 and 8.
Step 5: Shoot and adjust.
Step 1
First, let’s look at setting up the camera and the settings you should be using. The very first thing you should do when you are going to shoot a concert is make sure your camera is set up correctly. This means ensuring you are using continuous autofocus and that your camera metering is set to spot metering. We will be shooting in manual mode, but we use spot metering as a safety net. If the meter in the camera shows that you are very under or overexposed, then it is time to quickly check one shot to double-check your exposure.
For each camera, the steps to do this are different. If you don’t know how to set up your autofocus settings or how to put your camera into manual mode, then you are not ready to be shooting a show. If you are stuck, there are tons of basic shooting guides on the internet to watch.
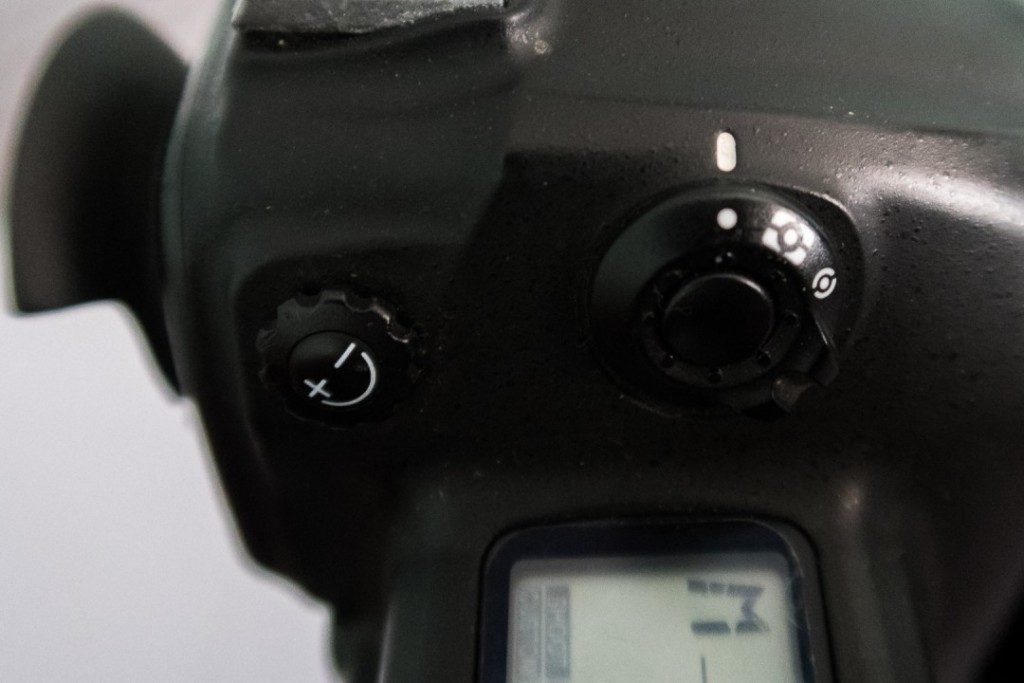
Spot metering is set on my D3S, but each camera has a different location to set this. You need to check your camera manual if you don’t know how to do it.
This is set once and forgotten. After you have set your camera to these settings, they become unimportant unless you accidentally bump them. When you are waiting for a show to begin, make sure that you are constantly checking your camera to ensure it is set up correctly. It is so easy to bump a dial and mess up your shot.
Step 2
The easiest step for you to do is to make sure the camera is set to manual mode for shooting. Again, each camera is different, so you need to check your camera manual if you cannot figure this out.
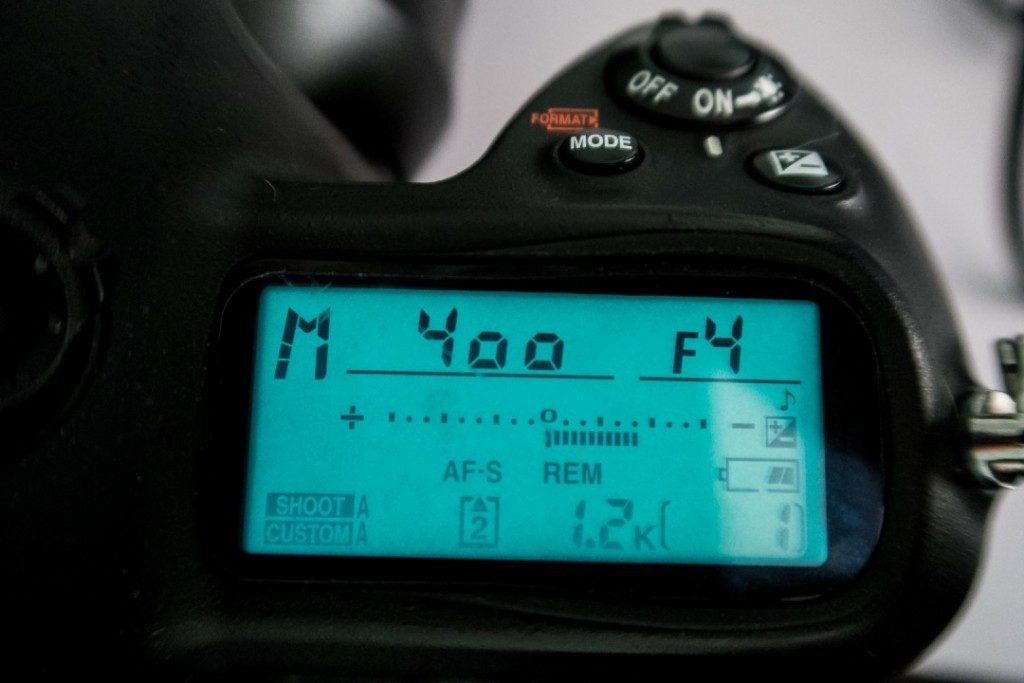
The camera is set to manual mode and setup with my Rule of 4 guides that I shoot by.
Step 3
Now comes the important part of shooting, which starts with the most overlooked aspect: setting the correct white balance. You should not use auto white balance when you are shooting. White balance can affect your exposure in ways you might not expect. Let’s look at some examples. Most stages will use a combination of LED and spotlights to light the stage. Spotlights are easy to deal with, but LEDs are a complete nightmare.
The Ignition Shoot on a stage using mostly halogen lights. Stage lights are easy to deal with
木玛&Third Party Just behind the singer’s hand is a horrible LED light that causes so many problems with white-balance.
Now, if a show is lit completely with stage spotlights or only with LEDs, then it is easier than when both types of lighting are combined. The problem is that different lights use different color temperatures. Generally speaking, a red light will be a little brighter than a blue light to the naked eye. So when you look at a very red image on your camera’s LCD screen, you might think it is underexposed, but as soon as you correct the white balance, you may realize that the exposure is fine. The same goes for a very blue light. You might think that the image is overexposed, but as soon as you correct the white balance, the exposure is fine. This is one of the reasons why so many concert shots are converted to black and white—because the photographer screwed up the exposure when they did not have the correct white balance settings. In post-processing, they had little option but to convert the image to black and white and make some adjustments there. Always remember that black and white is the easiest way to hide exposure mistakes on stage because a grainy photo in black and white can be artistic to some people.
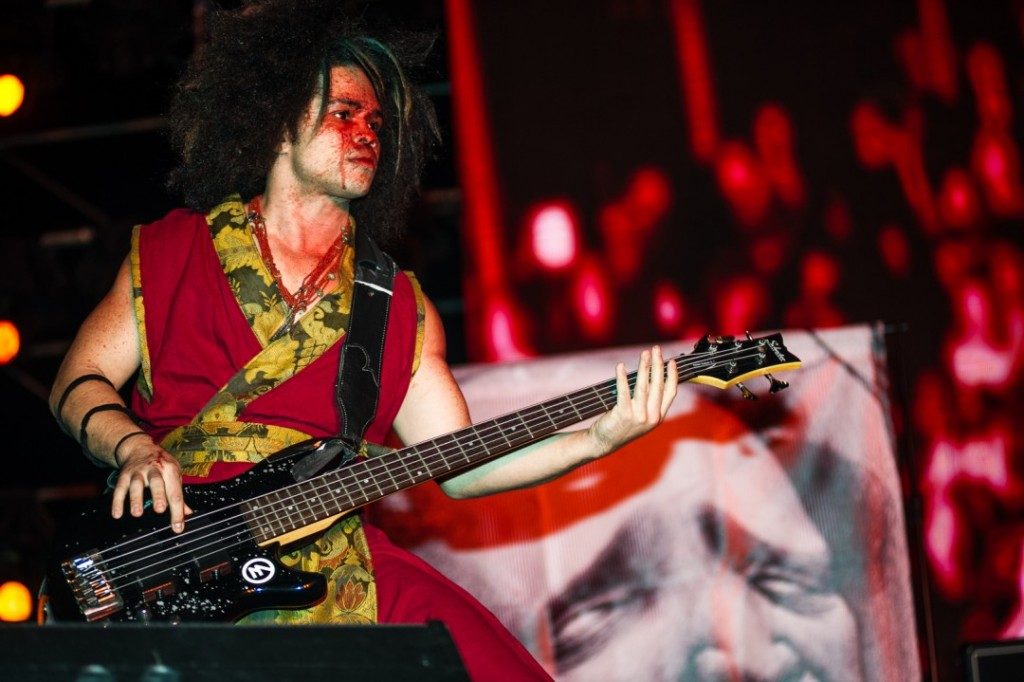
零壹乐队 Voodoo Kung Fu. This was shot with flash and you can see that the image is terrible. The flash has killed all the mood of the shot.
When you are going to shoot a show, the first thing you should look at is the lights. If you can, get access to the stage, walk around the pit, and look at the lights and their angles. If there are a lot of LEDs around, then you know that the light temperature is going to be very red, so you need to change the color temperature to very blue. If I see a lot of stage lights, then I know that I need a warmer white balance in my settings. The white balance just needs to be roughly correct to help you with the exposure. You will set the final exposure in post-processing.
My white balance was set to 2500K on my camera and edited to 2000 in Lightroom.
You want the almost correct white balance to help you control the exposure. Generally speaking, my setting for a lot of LEDs is around 2500K and usually, that will be dropped down to 2000K in post. I wish my Nikon would be able to shoot at 2000K but you got to work within the bounds of your gear.
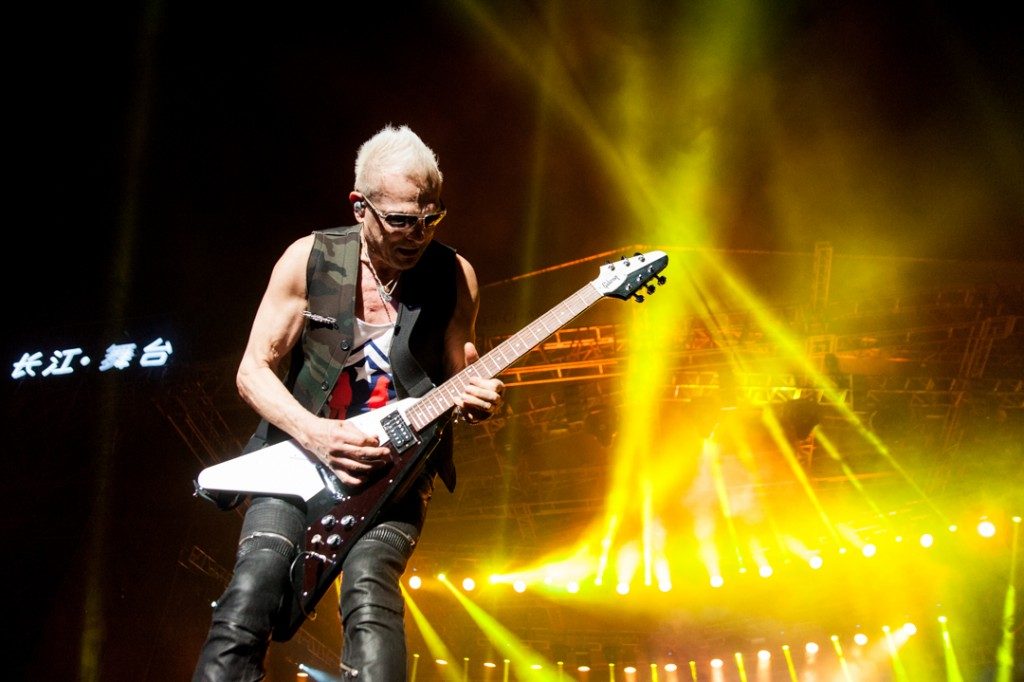
Scorpions had lots of stage lights in the background and front lighting, making it really easy to shoot them.
If the stage is mostly lit with spotlights or stage lights, then my white balance setting is usually around 4000K. However, each stage is different, and you will have to find the perfect setting for each one. There is no one-size-fits-all setting. The main idea behind correct white balance is that it helps you get the correct exposure if you are checking your shots.
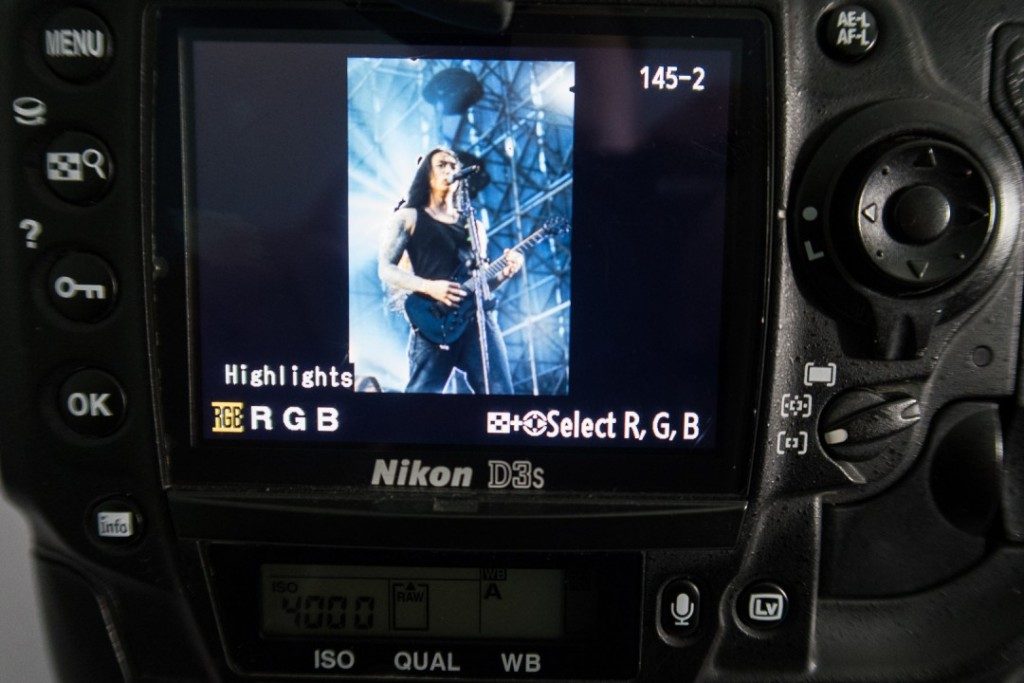
When chimping, make sure that you have the highlights option turned on, and that you watch for blown highlights on the artist’s skin. You don’t chimp for focus, only to double-check your exposure and you do it as quickly as possible. Every second you chimp is a missed shot. I have no idea if Canon has a highlight option, but I will assume that they do.
Step 4
Once you set up the metering system and the white balance, the next step is setting up a basic exposure setting. As photographers at a show, we cannot control the lighting or use our own lighting tools, so our tools to control the lighting are aperture and shutter speed. Shows can be extremely difficult to shoot or extremely easy, and a lot of this depends entirely on the lighting design or setup on the stage.
I have two rules that I give to my assistants to help them set up a basic exposure for shooting in the daytime and nighttime. For daytime, I have my assistants shoot using something that I call the rule of 8s.
This is really easy to remember. You set the ISO to 100 or 200, set your aperture to f/8, and your shutter speed to 1/800. It is the basic exposure setting that you start from, and you adjust the setting from there. If it is extremely sunny and bright, then you increase the shutter speed, and if it is overcast and a little dark, you adjust your shutter speed and ISO accordingly. More on shutter speeds a little later. Shooting in the daytime is really easy because you should have a lot of depth of field, lots of light, and a fast shutter speed. So you can just concentrate on composition.
幻日 Anthelion
But once the sun sets and the lights come on, getting the correct exposure becomes more difficult. I usually tell my assistants to use the Rule of 4. The Rule of 4 is a rough guide to exposure at concerts when setting up at the beginning. The Rule of 4 works like this: You set your ISO at 4000, your aperture at f/4, and your shutter speed at 1/400. This is a good basic setting that you can adjust very quickly.
香蕉鱼乐队_BanaFi
Step 5
Now, if you have set up the basic Rule of 4 and the show begins, but the lighting is worse than you imagined, there is a systematic way to change your exposure. The first step to increase your exposure should be to go from f/4 to f/2.8. That is a full stop of light. If you need more light, then you can drop your shutter speed next, depending on the focal length of your lens and the type of artists you are shooting. More on this later in the lesson. But if you drop your shutter speed from 1/400 to 1/200, that is another full stop of light that you have increased.
九宝乐队 Nine Treasures
The shutter speeds you should use depend on the lens focal length and the type of artist you are shooting. If your lens has some kind of image stabilization, it can help with some artists but not all. So here is a list of shutter speeds that you should remember for different artists:
A punk or metal band should always have a shutter speed of 1/400 or more. You need 1/400 or higher to freeze the hair, nail the jumps, and capture the stomps. These artists just move around too quickly to shoot at a slower speed.
![]()
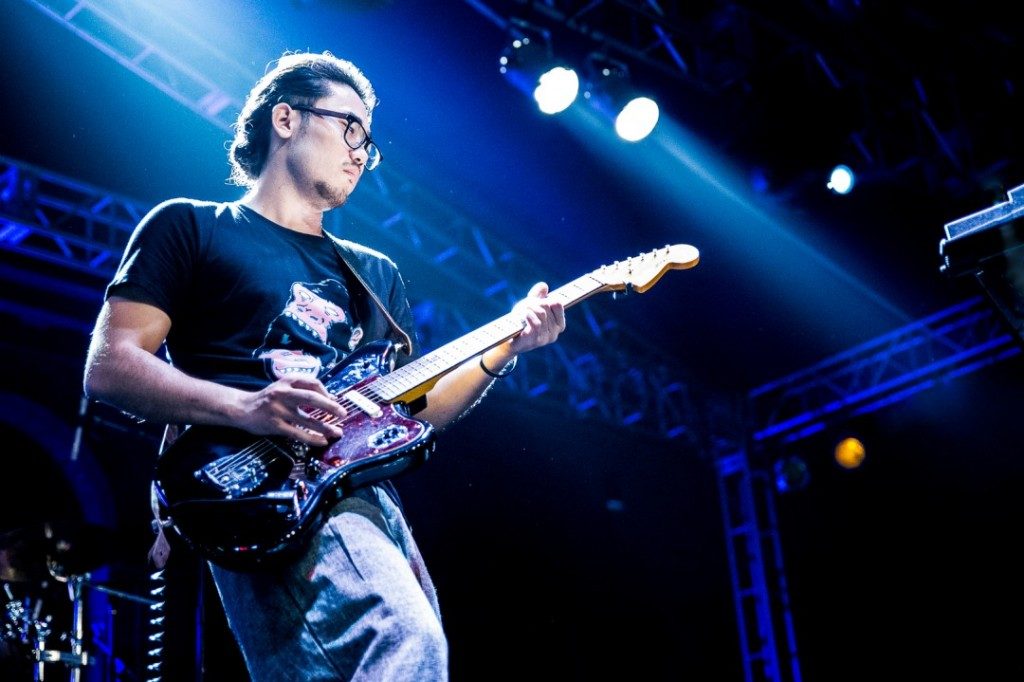
For a soft or classical rock band, you need a shutter speed of 200 or more. Under 200 is just too slow to freeze the guitarists.
Hatake Band is a soft rock band from Japan
A pop band with lots of dancing will need a shutter speed of 320 or more
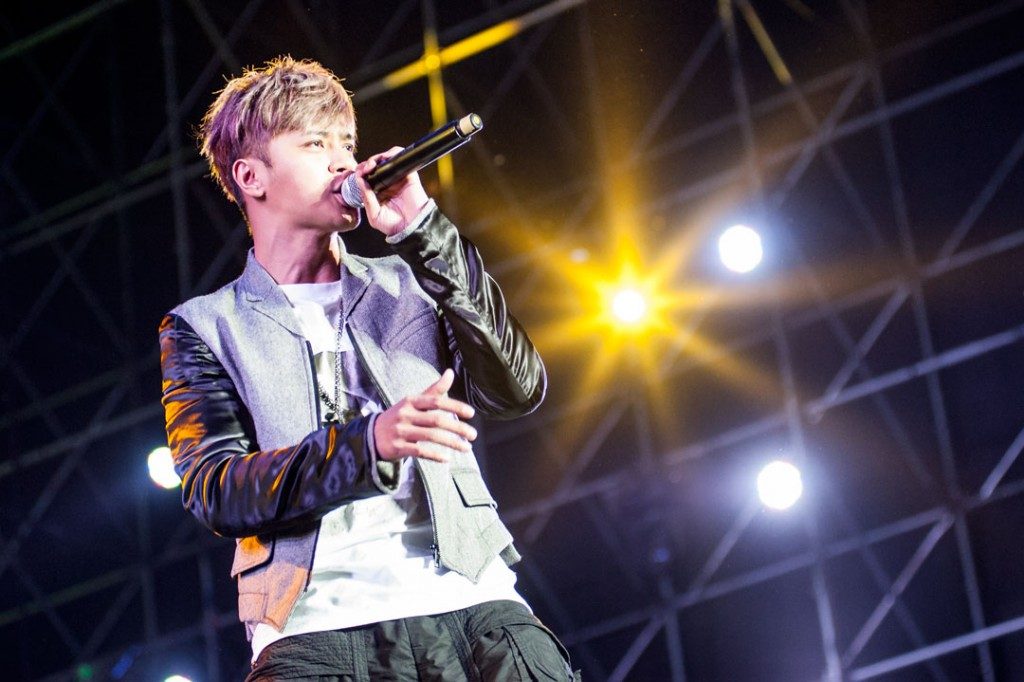
罗志祥 is a Chinese pop artist with thousands of screaming girl fans.
For a pop artist who is very stationary and just sings into the microphone and walks around, you can get away with a shutter speed of about 1/100.
痛仰-misserable-faith band is a Chinese folk band. Most of their songs are very stationary so you can use slower shutter speed to shoot them.
A folk singer or a guitarist who sits down, you can shoot at a shutter speed of around 60 or faster.
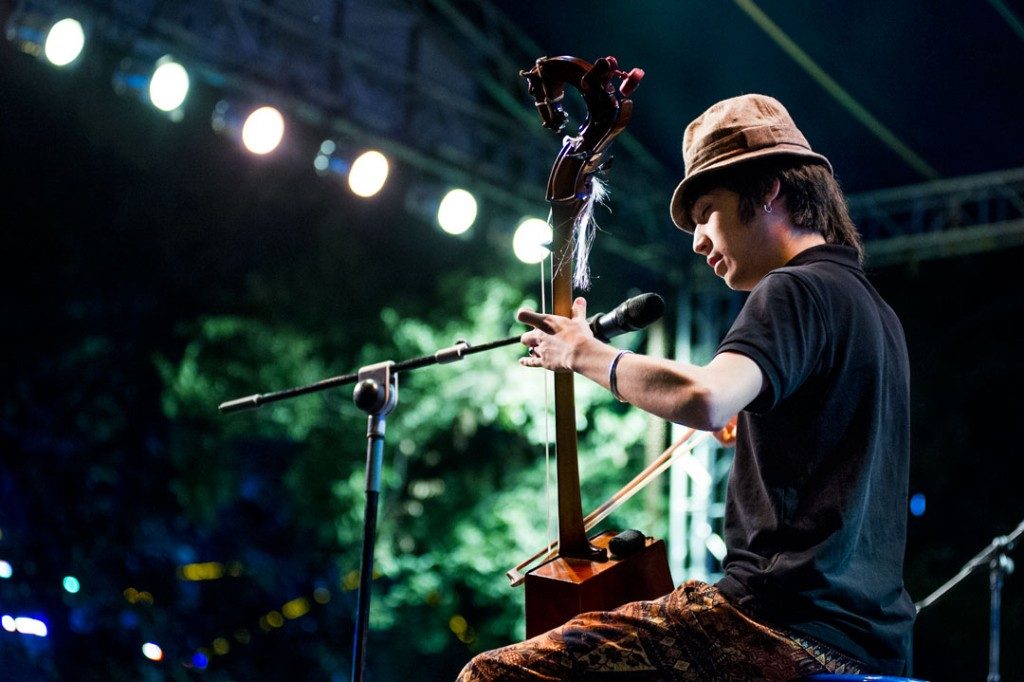
TaanTowch纽扣乐队 is a Mongolian folk band.
The drummer. The drummer will always need a shutter speed of 640 or higher to freeze them. Their arms move very quickly at times, so you need the fastest shutter speed you can get in your lighting conditions. For drummers, faster is always better
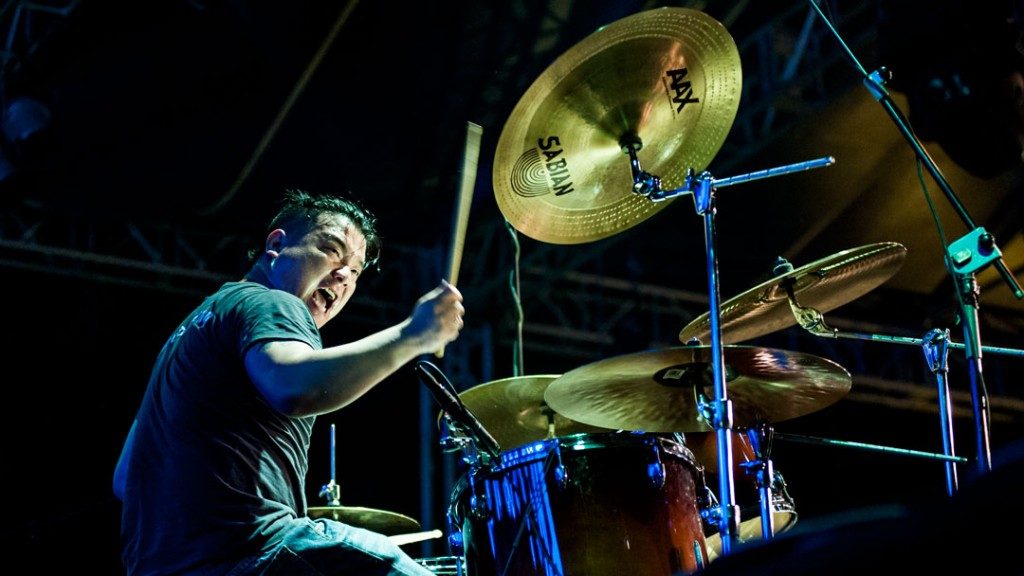
Rip band. I love to get below the drummer and shoot up towards them but you have to always watch your shutter speed.
Now all these shutter speed recommendations are just a rule of thumb or a starting guide. You need to adjust them on the fly when you are shooting. Just don’t be the fool who comes back from a show and wonders why all his images are out of focus after shooting a punk or metal band with a shutter speed of 50. Motion blur has its place in photography, but generally, in music photography, motion blur is our enemy. No one likes to see him in a photo.
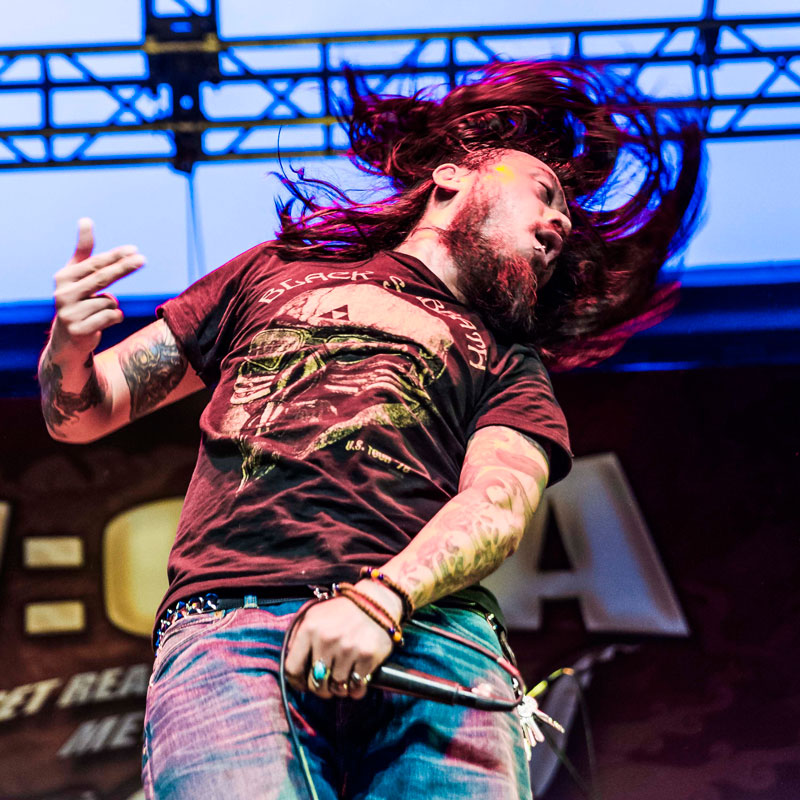
Never Before playing at WOA. Even though I had a fast shutter speed, I still got motion blur in his hair. Lucky for me it worked in this shot but you will always be surprised at how fast things move on stage.
Now, what do you do if you have reached your limit with shutter speed and aperture and it is still too dark? Then you start to increase your ISO. Don’t fear the noise. The way noise works with DSLR is that the out-of-focus parts and the dark parts of an image tend to get noisy, while the focused parts and well-exposed parts tend to not be too noisy. I shoot many shows at ISO 8000 or 10000 and have not received a single complaint from a magazine or newspaper editor about an image being too noisy. A newspaper or magazine editor never zooms into an image at 100% to view it—only photographers do that. So don’t be afraid of raising the ISO.
So if you have dropped your shutter speed and aperture to the lowest possible f-stop, then you should start to raise your ISO in half-stop increments—so go to ISO 5000, then 6400—until you either hit the max ISO you are comfortable shooting at for your camera. This is where knowing your camera is so important. You need to know what your camera is capable of doing and what you are capable of doing with it. When I used to shoot a lot with my D700, I was only comfortable going to ISO 4000 for color shots and ISO 6400 for black and white shots. With my Nikon D3s and D4, I am very comfortable at ISO 8000, and if I am sure I nailed the exposure, then ISO 10000 is no problem. Any higher, and the image has to go to black and white. Know your camera, and know how to change the settings of the camera with your eyes closed. The camera is our tool, and we must be experts with it.
扭曲机器乐队 Horrible lighting conditions means I was shooting at ISO 6400 so the images had to be converted to black and white. I had no complaints about the image being too noisy from my editors and the picture was published by a couple of newspapers covering the event.
Shooting manually means being able to shoot and change settings quickly and accurately. You have to be able to change the settings of your camera without looking at it. You must master your camera to be able to shoot quickly under pressure.
Difficult shooting situations
Now, there are some difficult situations that I would like to talk about that you may experience when shooting in the pit and how to overcome them. The first is a relatively new problem that has cropped up over the last couple of years: the problem of the giant LCD screen behind the artists. These screens can be a huge pain for even seasoned pros. The reason they can become so difficult is that they can become very bright, and while the artist is in front of the screen, all that light from the LCD screen will wrap around them. This makes it very hard for your camera to focus on the artist, washes away all the contrast from the image, and makes getting the correct exposure almost impossible unless you are either shooting manually and know how to deal with this or you pop off a shot with flash. I will fire any of my assistants who shoot with a flash, as it is disrespectful to the artist. I have solved the problem by using angles in the pit and being patient.
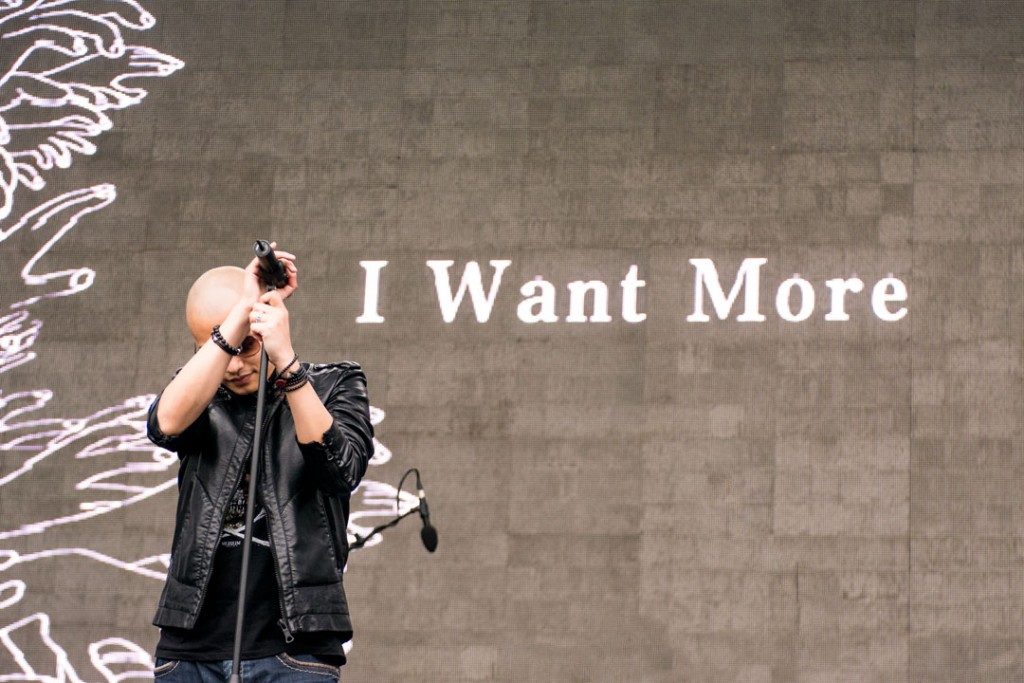
Shooting an LED screen in the daytime is easy and if you time your shots right, you can get some great shots. Shooting the same screen at night is a nightmare.
If you are shooting with a bright LCD screen in the background, do not shoot the artists from the center of the pit. Instead, make your way to the artist’s open side and shoot from a 45-degree angle. This will help to eliminate a lot of the light wrapping you are getting from the screen and it will help with autofocus. I normally also change my ISO to about one stop lower for these kinds of shots as the light bleeding from the LED screens tends to bounce off everything.
军械所乐队 The artist was so difficult to expose for. I was shooting nearly from the center of the pit at the time which made the light bleeding crazy. I had to drop the exposure by two full stops and then boost the shadows on his face in post.
The next biggest problem you will encounter with exposure is when a show has no front lighting and is instead lit from the sides and above. This means that the stage is usually very bright, but the artist’s face is very dark. This is a tough situation to deal with because the dynamic range is huge, and it may be more than your digital camera can handle.
Nova Heart shot with terrible lighting. We only had side lighting for this show to work with.
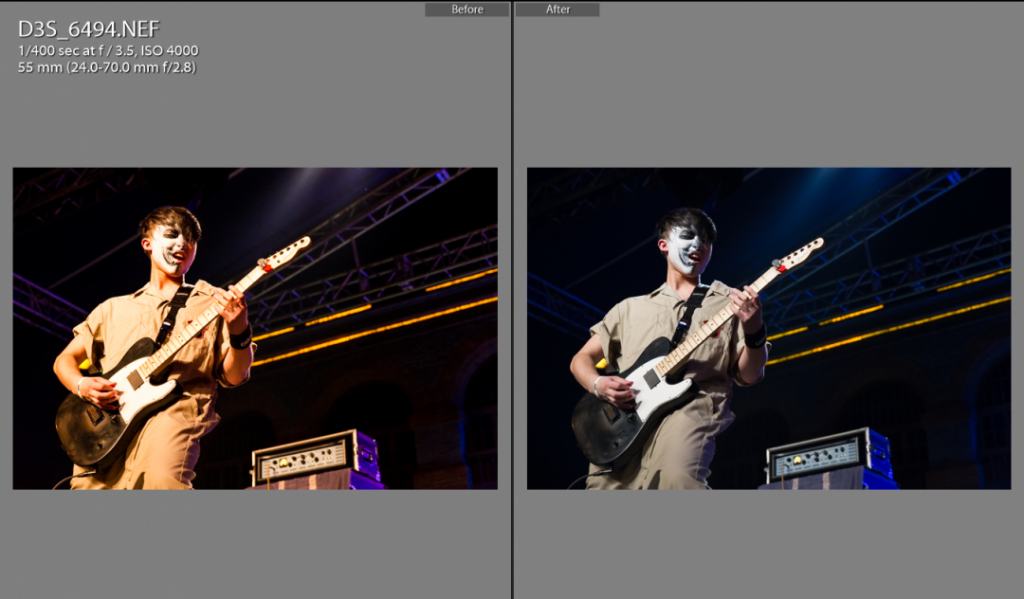
If I am faced with this situation, I normally expose for the brightest part of the artist’s body, because I know that with my cameras, I can recover shadow detail in post-processing much more easily than if I had to deal with clipped highlights. I always tell my assistants to remember that a little dark is much better than way too bright. In these situations, I usually use an adjustment brush in Lightroom to increase the highlights and shadows on the artist’s face by 10% in post-processing, and this is usually enough to recover their face in the image. I will show the post-processing of images in another lesson in the future.
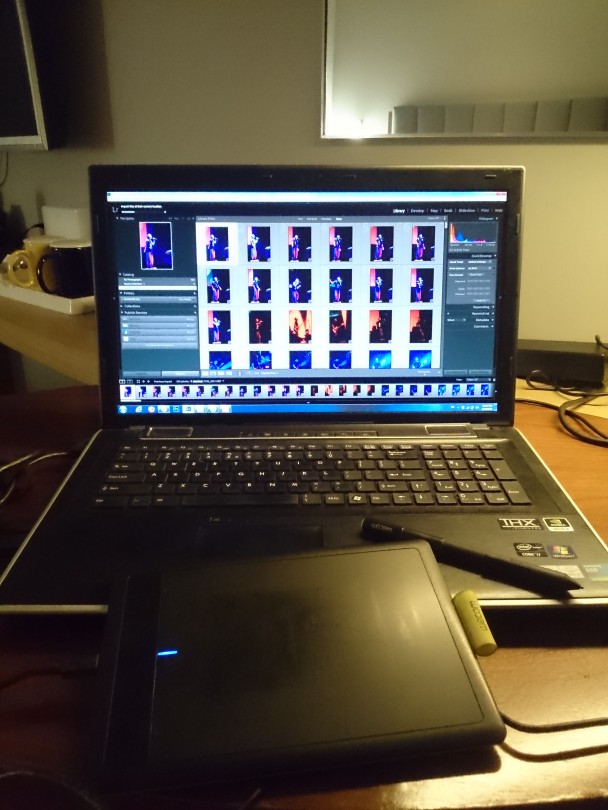
Editing in my hotel room late at night after shooting all day.
TThe final advice that I will give for exposure is how to chimp correctly in the pit. Chimping is not about checking focus. You have to trust your camera’s autofocus. Chimping is all about checking your exposure. If you are not sure if your exposure is correct, you quickly chimp the last shot. You just preview the image on the screen and check to see if you are over or underexposed. You don’t zoom in, you don’t check composition; you only have time to check the exposure. A quick chimp should be less than one second. Any longer than that and you are missing shots on the stage.
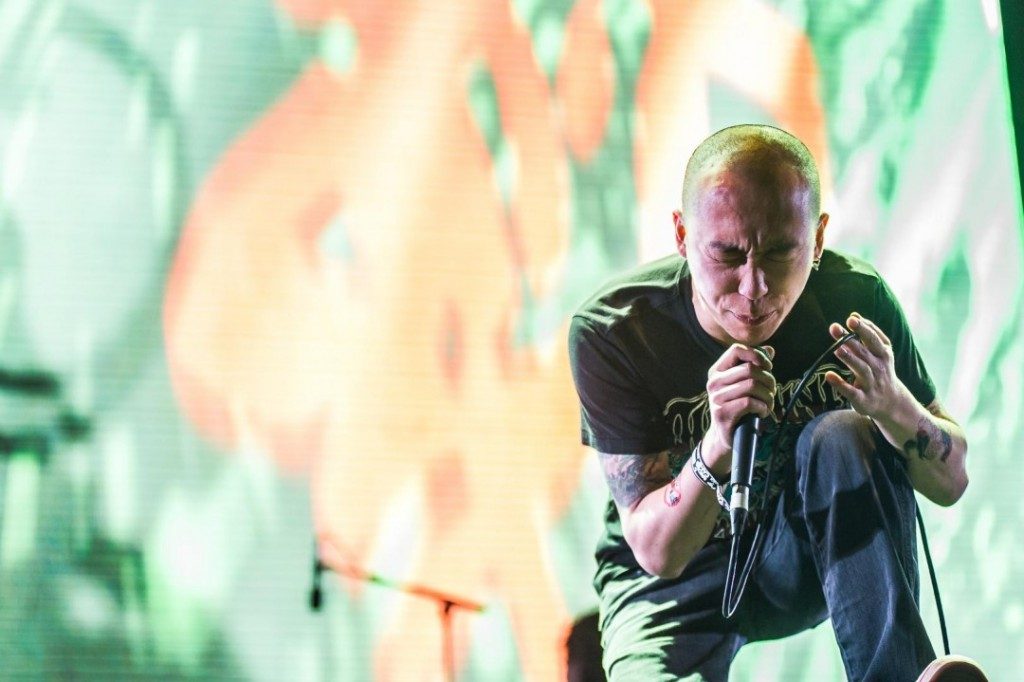
后海大鲨鱼乐队 Never trust your camera’s meter. When shooting this artist, my camera meter kept telling me that I was way underexposed, it kept telling me that I was about 5 stops under. I trusted my eye and my eye was much more accurate than the camera meter. When artists wear white clothing on stage and you have a huge LED screen behind them, there is just no way your camera can meter for this correctly
To round this up, use the Rule of 4 to set up the basic exposure. Once you have the basic exposure set, adjust your shutter speed higher or lower as the light changes. Use your eyes as you shoot. If the lights look like they are getting brighter, increase the shutter speed; if it is getting darker, decrease the shutter speed until you are uncomfortable, and then adjust the aperture or ISO to help you. But always adjust the shutter for as long as possible. Use common sense—if you are shooting in a very dark environment and then they put on a lot of stage lights, don’t raise your shutter speed to 1/4000. If your shutter speed is that high, then it is time to drop your ISO down. You have to learn to guess the exposure values just using your eyes.
You should always be shooting and working during a show. Shot and move. There are always more photos to be shot, you just have to find the angles and the exposures that will work.
Guessing exposure values used to be easy for people who came from the film world and whose cameras had no meters. They had a well-trained eye for exposures and could set their cameras very quickly. A lot of street photographers today live by the Sunny 16 rule to set their exposures. Train your eye to do this. It is not that hard to learn, and you can do it quickly. If you are sitting in a room or walking somewhere, ask yourself what ISO you would use, and what shutter speed and aperture you would set to get the exposure. Guess it, and then either take out a camera and see what its meter gives you, or use a light meter app on your phone to check the exposure. I do this almost every day when I am sitting on a bus or train. As photographers, we have to train like any other kind of artist. I will do another lesson in the future about training in photography.
![]()
But that is all for today. We covered the basics of how to set up and shoot in manual mode at a concert or music festival, but these rules apply to all kinds of photography. If you can shoot a concert or festival in full manual mode, you can shoot anything. Next week, we will look at the basic workflow of a concert shoot: from preparing for the shoot, capturing the gig, to processing and delivering the images to your clients.
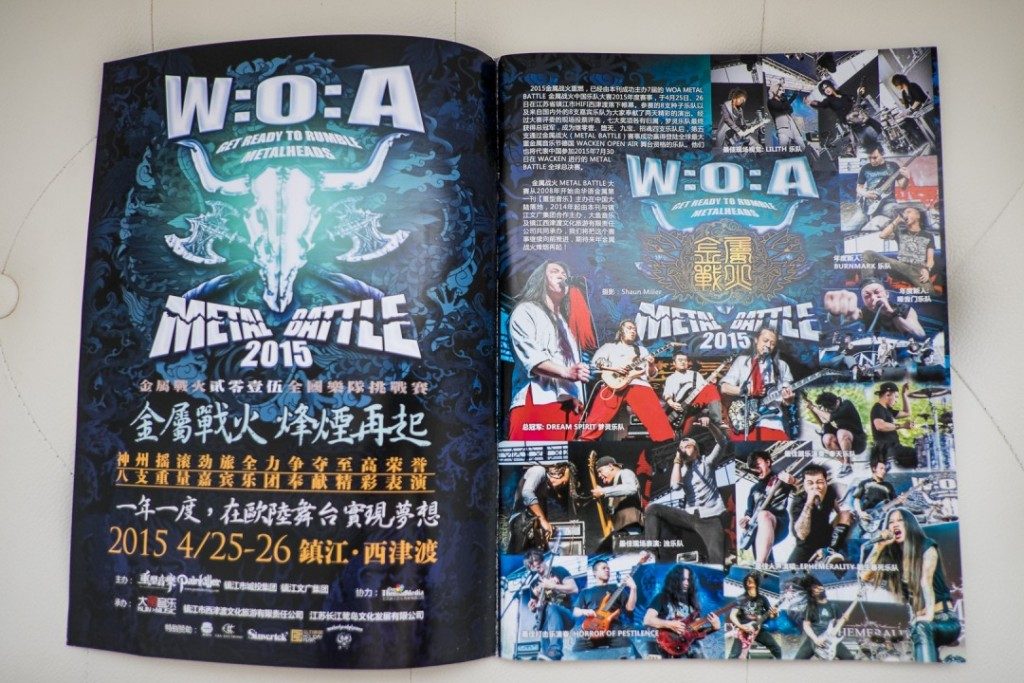
After hundreds of magazine prints, I still enjoy seeing my name in print. I don’t care about being published on a website. But newspapers and magazines still bring a smile to my face when I see my name in them.
Until next week, keep shooting and have fun.
Shaun.