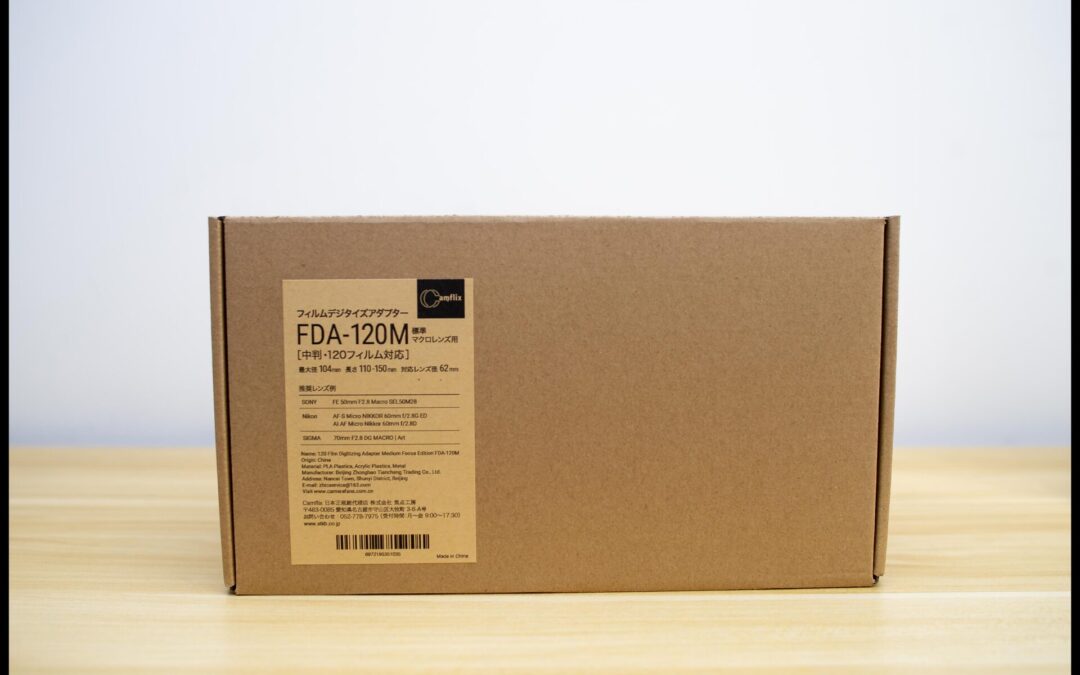
Camflix Film Digitizing Adapter Review
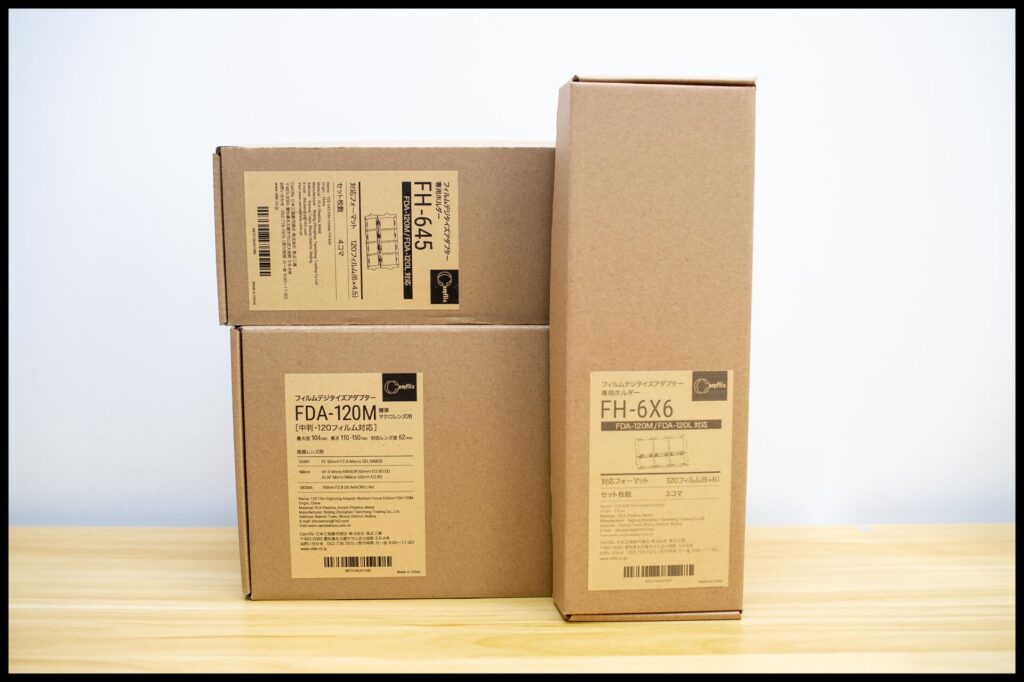
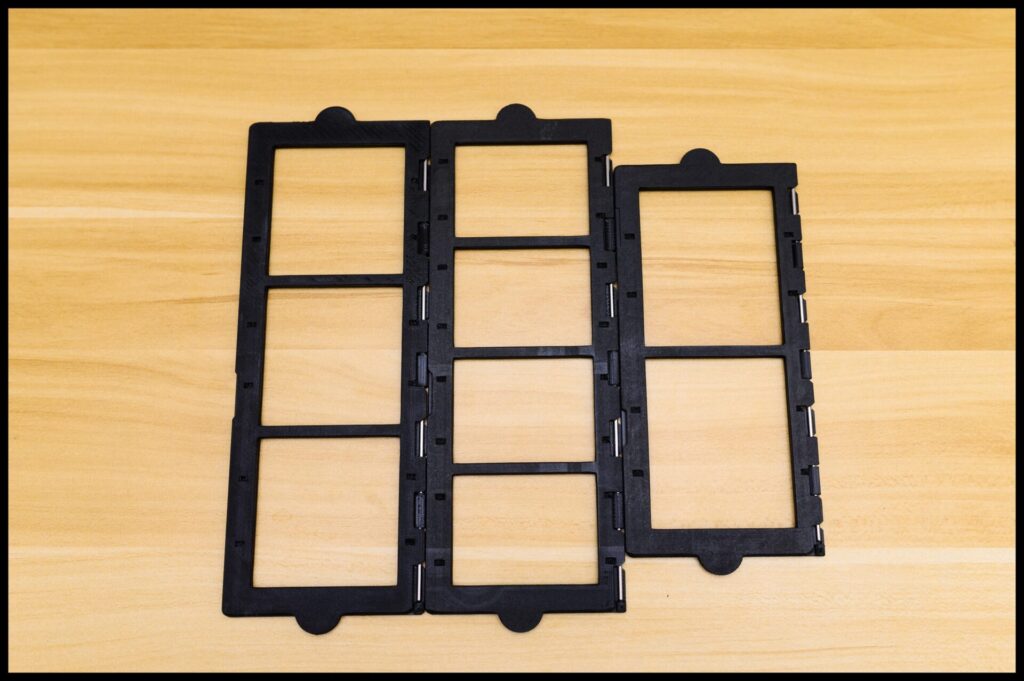
The Camflix 120mm film digitizer with three film holders for 645, 6×6, and 6×7 film negatives.
It is no secret that I have hated flatbed scanners, especially after the horrible Canon CanoScan 9000F Mark II which almost made me stop shooting film as the results were so bad. could not believe that I got so much better results from my 35mm scans with my Plustek scanner compared to my flatbed scanner. Last year I bought the Nikon ES-2 Film Digitizing Adapter and it showed me how good results from a digital camera and a macro lens could be. The only problem was that the Nikon ES-2 Film Digitizing adapter was that it could only be used to digitize 35mm film. Thankfully I found the Camfix Film Digitizing Adapter which could be used on 120mm film which is exactly what I was looking for as I really want to shoot a lot more 120mm film in 2021.
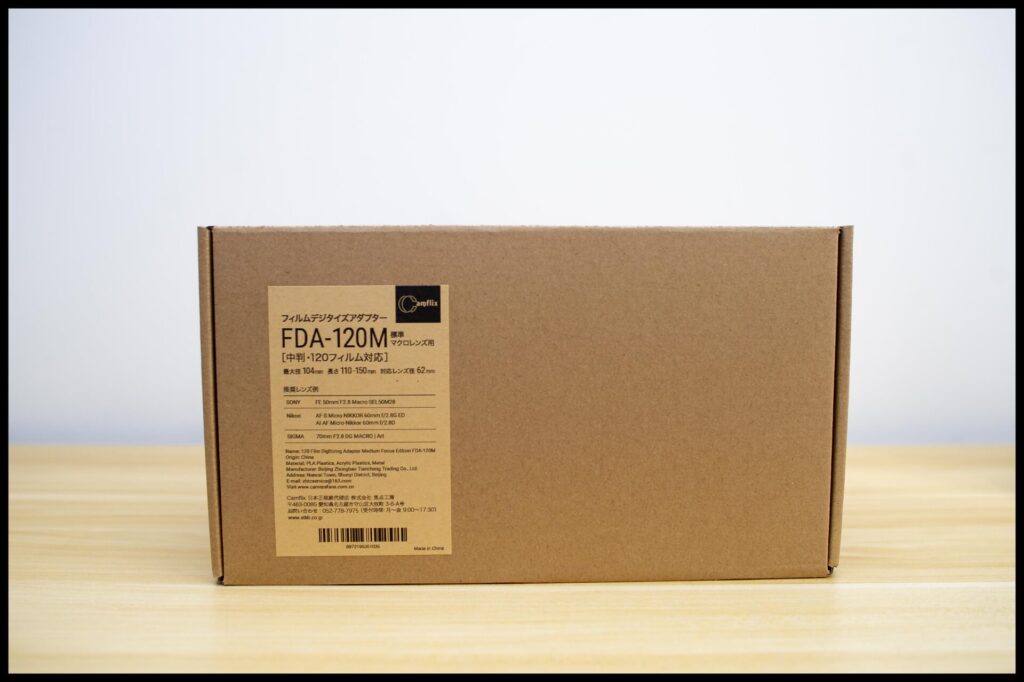
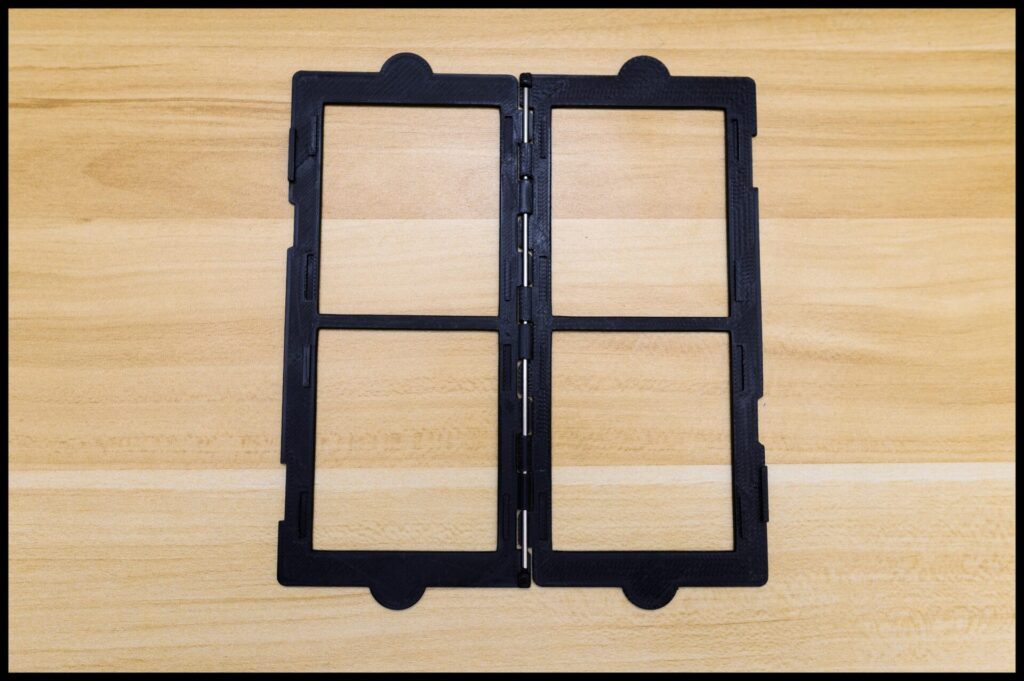
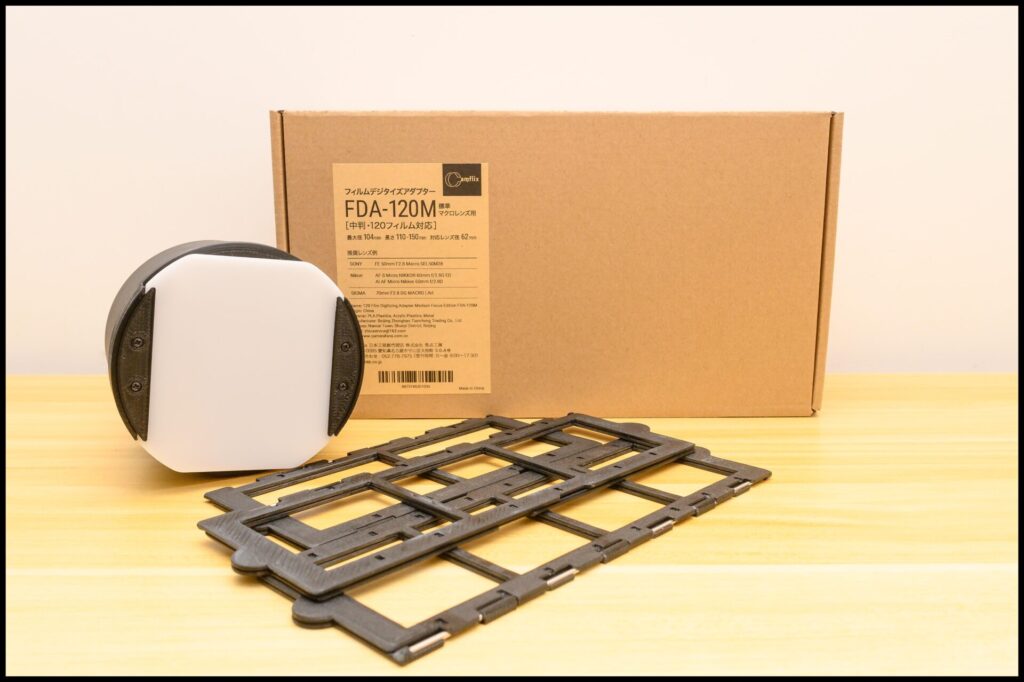
The standard Camflix 120mm film digitizer with a 6×7 film negative holder.
I ordered the Camfix 120mm kit, which came with a 6×7 film negative holder and an extension tube with a 67mm filter thread to attach to your macro lens. This allows you to adjust the distance from the macro lens and the Camfix 120mm negative holder so you can fill the frame of the negative you wish to record and get the most resolution from the negative. This is really useful as it allows you to use different film holders, such as the 6×6, 645, and even pano scans from the xpan, so you can scan different medium formats.
I ordered two extra film negative holders, for both the 645 and 6×6 negative shots.
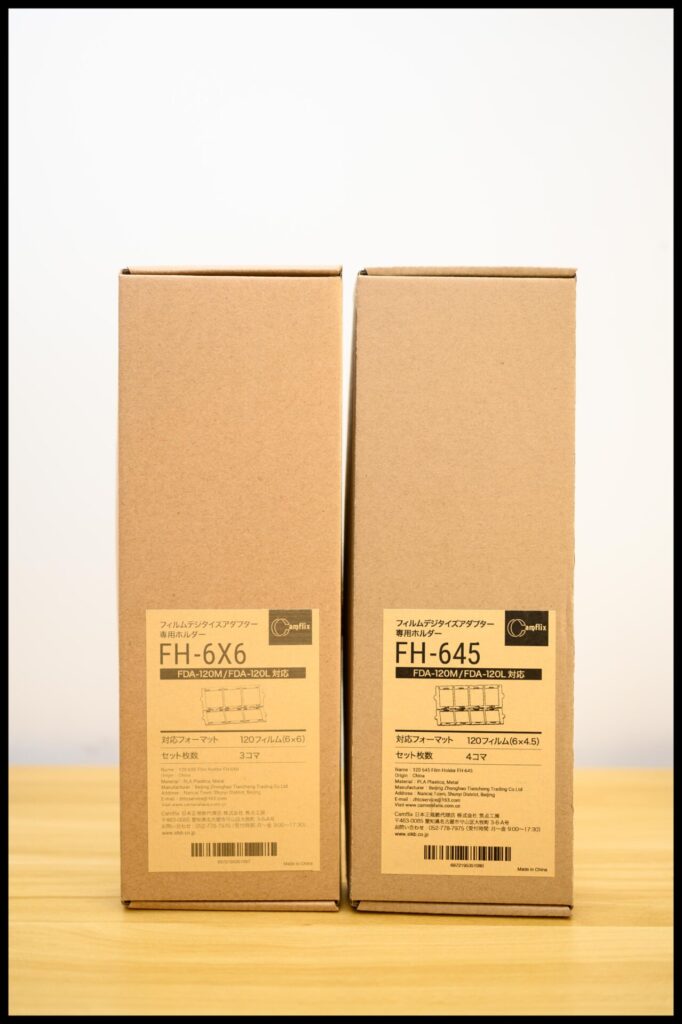
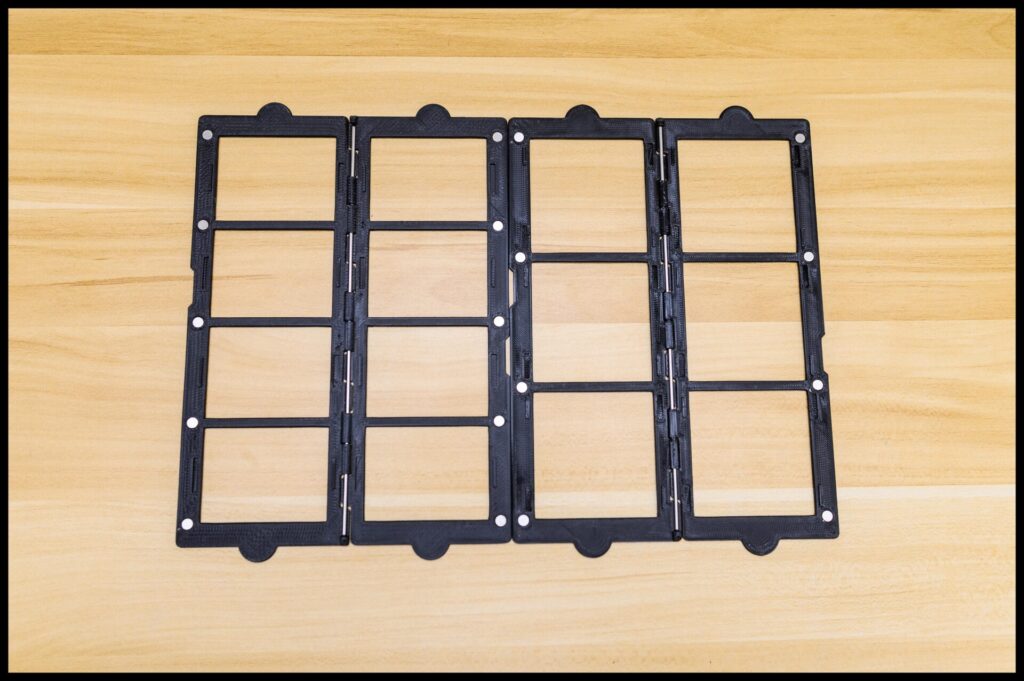
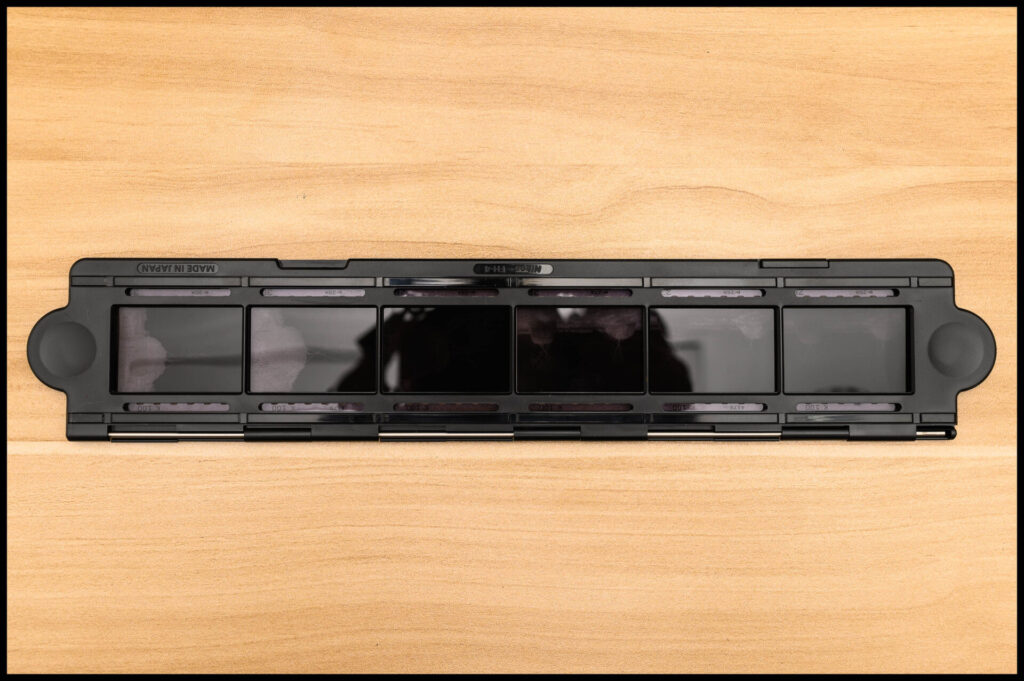
The negative holders for 6×7, 645 and 6×6
The film holders for 645 and 6×6 are nice and well-made. I like the small magnets which hold the film holders closed with the film strip in them.
The 6×7 film holder is not as nice as the 645 and 6×6 film holders. There are no magnets on the holder and the film holder closes with some plastic clips. Not as nice as the 645 and 6×5 film holders.
Since I shoot all three medium formats types right now, this is very useful. If we look at the film holders, they are very well made in my opinion and on par with the Nikon ES-2 film digitizer film holder but I think their design is slightly better as the Camfix film holders use magnets to close the to close and hold the film in place. This is really nice as you often have to open the film holders up to align the film correctly for each shot.
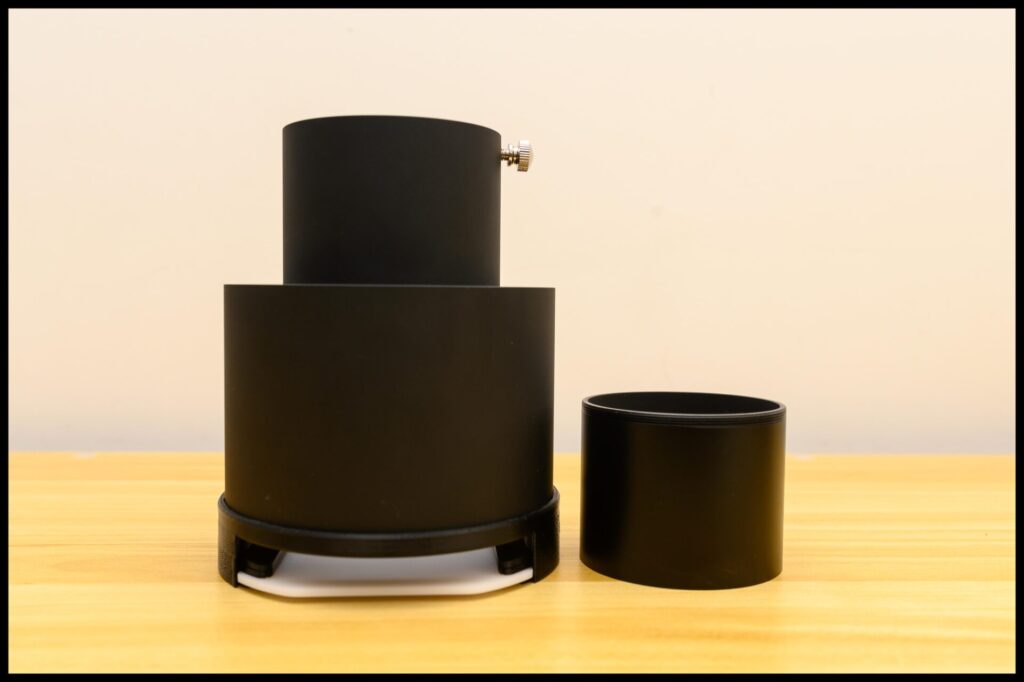
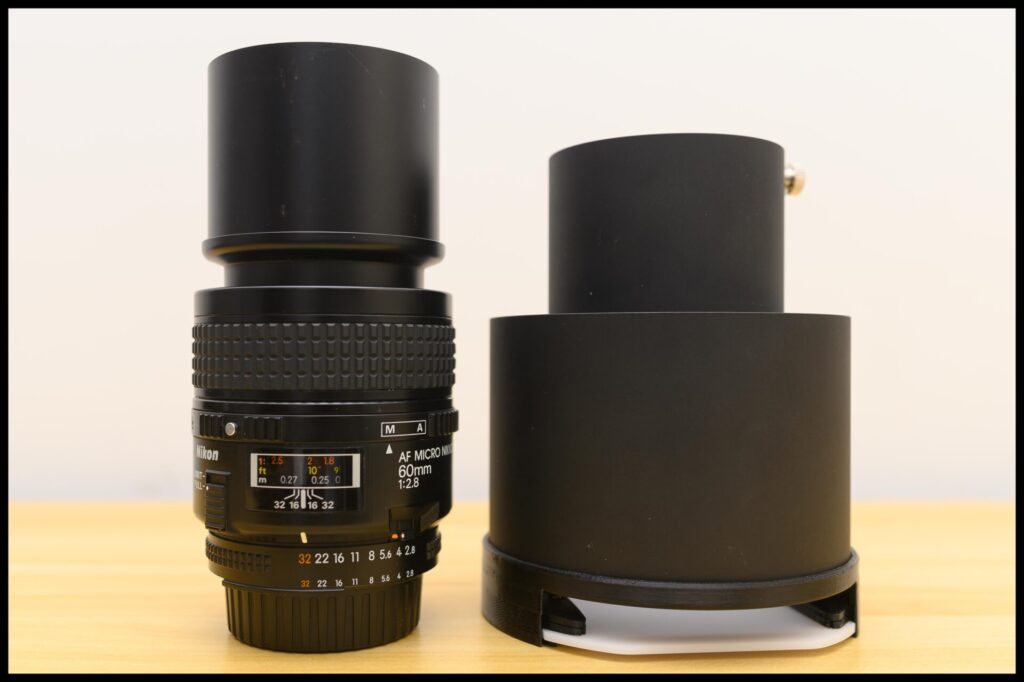
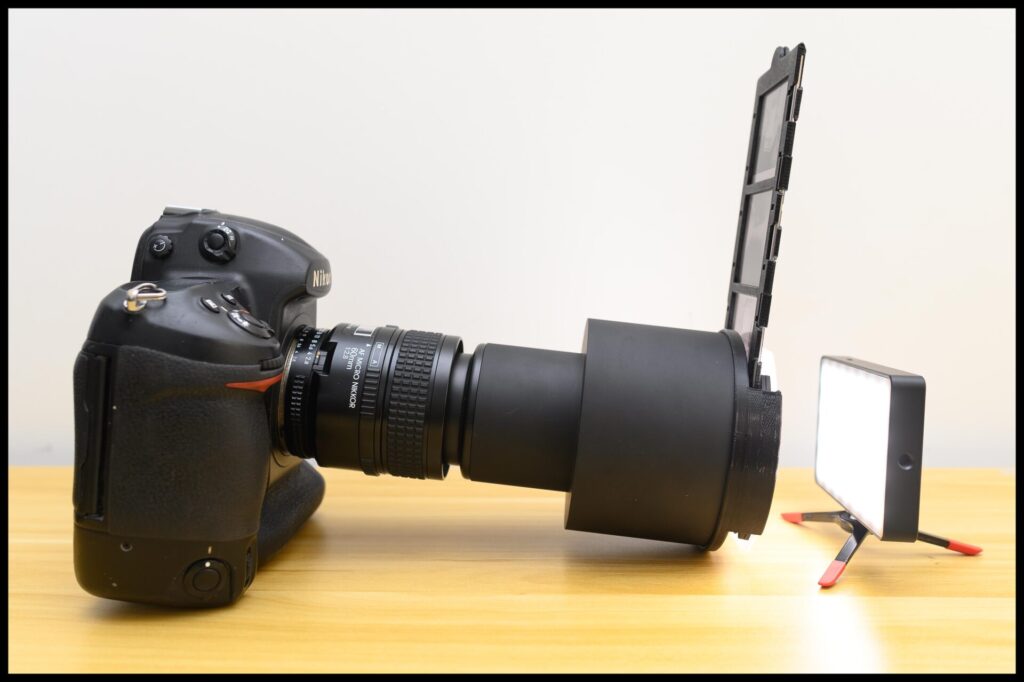
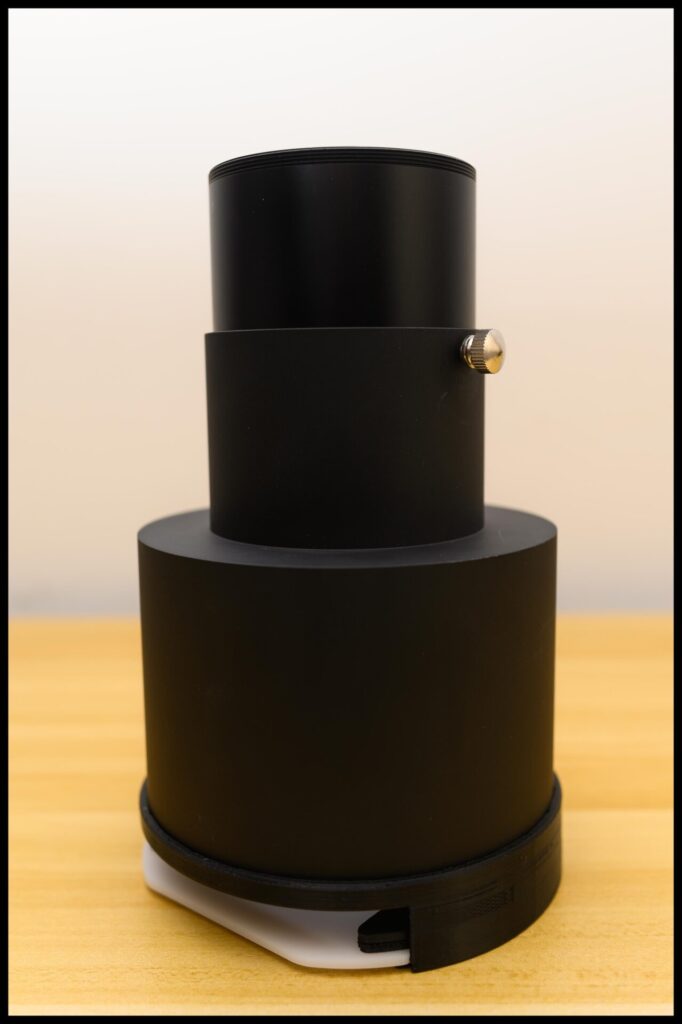
This is the film digitizer holder. It consists of a film clip holder and an extension tube that screws into the macro lens that you use. This is almost exactly the same as the Nikon ES-2 film digitizer.
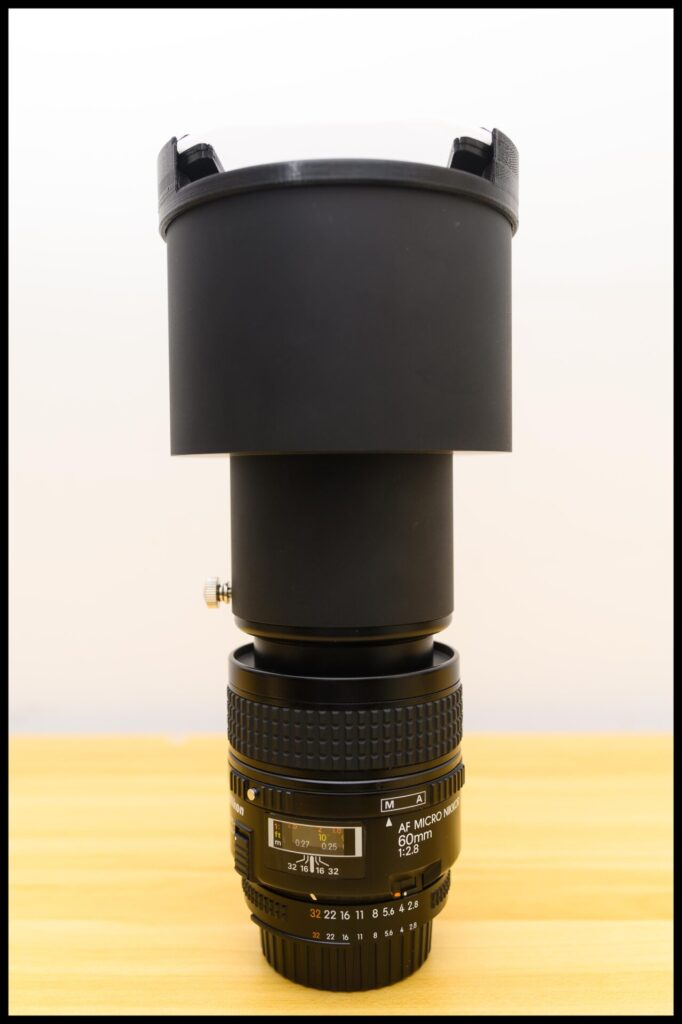
I really enjoy the fact that you can adjust the film holder and the extension tube, allowing you to change the distance between the film digitizer and the macro lens. This also allows you to turn the digitizer to any angle, so you can shoot 645 film shots and fill the frame as much as possible.
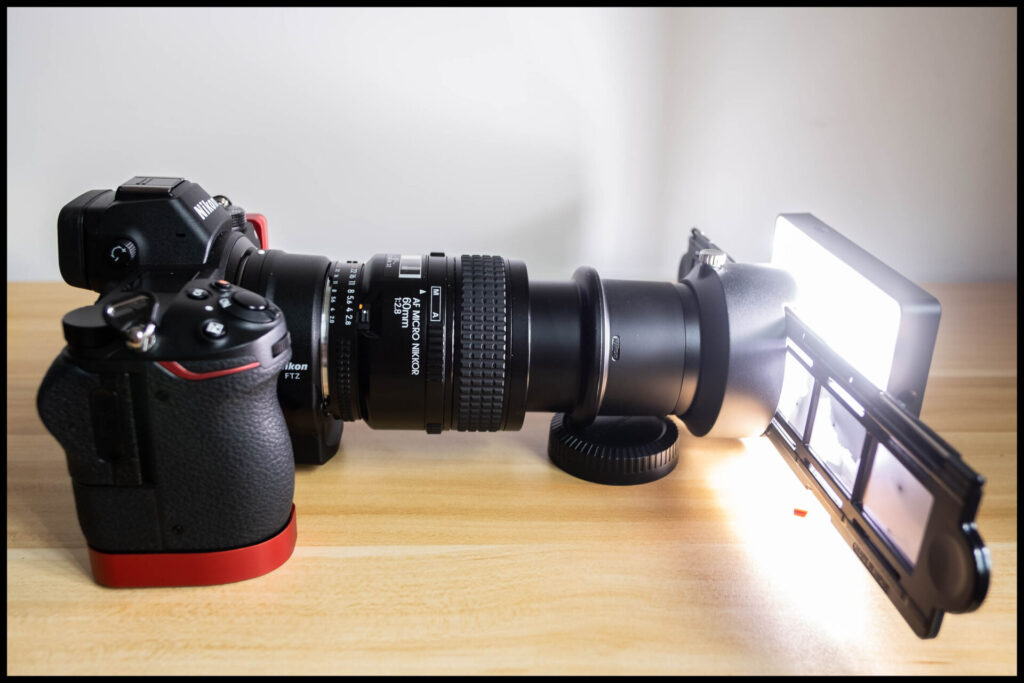
This is the basic setup for me. The macro lens works well with auto-focus on my DSLR but I shoot most of the shoots with the Nikon Z6 and manual focus as I don’t trust the autofocus to be perfectly accurate.
This is set up for shooting medium format negatives. The complete setup is fairly large but it works nicely.
The basic idea for digitizing film with a macro lens is simple: you focus on the film, which is perfectly flat, light the film from behind, and shoot the negative image. The biggest problem is aligning the film and the sensor to be perfectly parallel so you get a sharp result. The Camflix film holder makes this process very easy as the negative holders are connected to the macro lens, so it is always perpendicular to the lens. Unlike the Nikon ES-2 film digitizer, which is only really supported on two Nikon lenses, the Camflix film digitizer works on many different lenses.The officially supported lens is
But an important thing to keep in mind is that the Camflix negative holder is adjustable, so you can use it on almost any macro lens, as long as you can mount the Camflix to the front of the macro lens. Setting the Camflix system up to digitize your negatives is really easy and usually takes less than one minute to do. Once you have the Camflix attached to the macro lens, all you need is a light source behind the Camflix negative holder, which is easy enough to do. You could use a lightboard, an iPad, or a lamp—it just needs to be a white light.
This is how I scanned my 35mm film shots with the Nikon ES-2 film digitizer.
The Camflix is much larger because of the 120mm film format so the unit is front-heavy on even the largest DLSR. You could still light the film shots with small LED lights like this. It doesn’t matter if the camera is perfectly flat as the Camlix digitizer is attached to the macro lens, so the film and the camera sensor are always parallel.

I have found that it is better to light the film shots with an old video light with barn doors. This allows me to concentrate the light in one direction and the light is consistent across the whole frame.
When I first started to digitize my 35mm film shots with the Nikon ES-2 film digitizer, I used a small LED light source. However, I have found another light source that I prefer to use now. I prefer using my older video lights with silver barn doors so I can focus the light in the direction of the Camflix film digitizer. This is much easier as I can direct all the light towards the negative with the barn doors. Once this is set up, all that is left to do is insert some film into the film holder, line up the film with the film holder so the frames are correct, and insert the film holder into the Camflix negative holder.
With 35mm film cameras, most of the spacing seems to be good across most cameras so you usually only have to align the film and film holder once per film strip, but the story is a little different with 120mm film sheets.
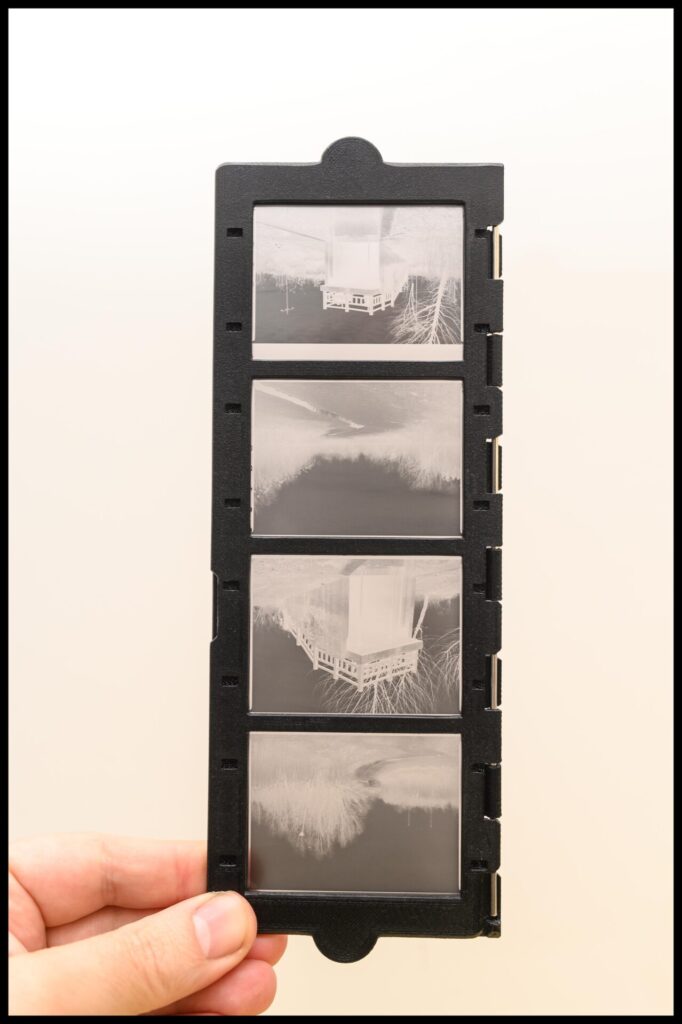
This is from my Mamiya 645pro and you can see that three shots are aligned perfectly but in the final shot on the frame, the spacing is wrong and I will have to adjust the film before I take that shot.
When I shot this sheet of film, I had to take the film holder out and realign the film before taking the last shot.
Lining up the film and the film holder is more complex compared to 35mm film in my experience because all my medium format cameras are not so consistent with the film spacing. This means that I usually have to line up each negative before I digitize the frame. This is slightly frustrating, but it is not an issue with the Camfix; it is really an issue with the different cameras that I use. I have five medium format cameras, and none of them are accurate with their film spacing.
When shooting with the Nikon ES-2 film digitizer, it is much easier as I don’t have to keep realigning the film between the different frames.
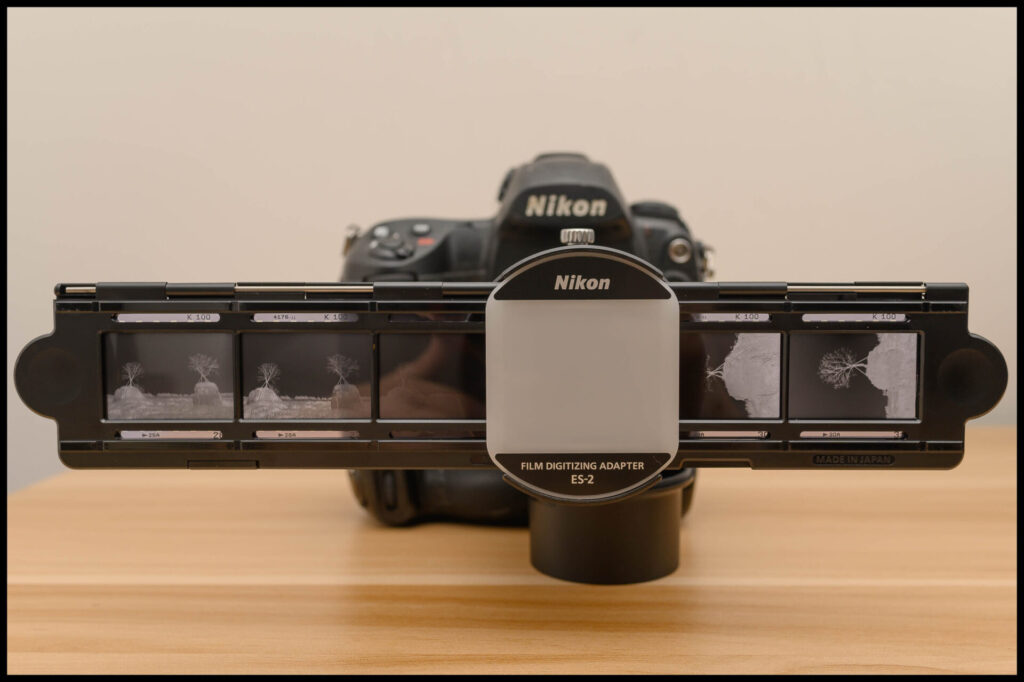
Once the film is in the film holder and inserted into the Camflix negative holder, the next step is to adjust the negative holder along the macro tube so that you can frame your shot on your digital camera and focus on the negative. Focusing on the negative is the most important step in the digitizing process, so it is important to get the Camflix negative holder into the correct position and tighten the screw on the side to hold the Camflix negative holder in place.
The metal screw in the film digitizer allows you to adjust the distance and orientation of the film holder and camera sensor so that both 6×7 and 645 film shots can be aligned to the sensor and you can film the frame as much as possible and get as much resolution that your camera can give you.
Once you have the correct distance, you can use the metal screw to tighten the Camflix negative holder to the extension tube and lock it into place for digitizing your film. This may take a few minutes to get perfect on your first shot because you may have some focus breathing with your macro lens. I have quite a lot of focus breathing with my Nikon 60mm lens, so I have to adjust the Camflix film digitizer each time I move to a different film format. But once you have your first shot in focus and the film negative is filling your frame as much as possible, there is no need to change this again. The first shot will take the longest to set up, but after the first shot, you could digitize a complete roll of 120mm film in less than one minute.
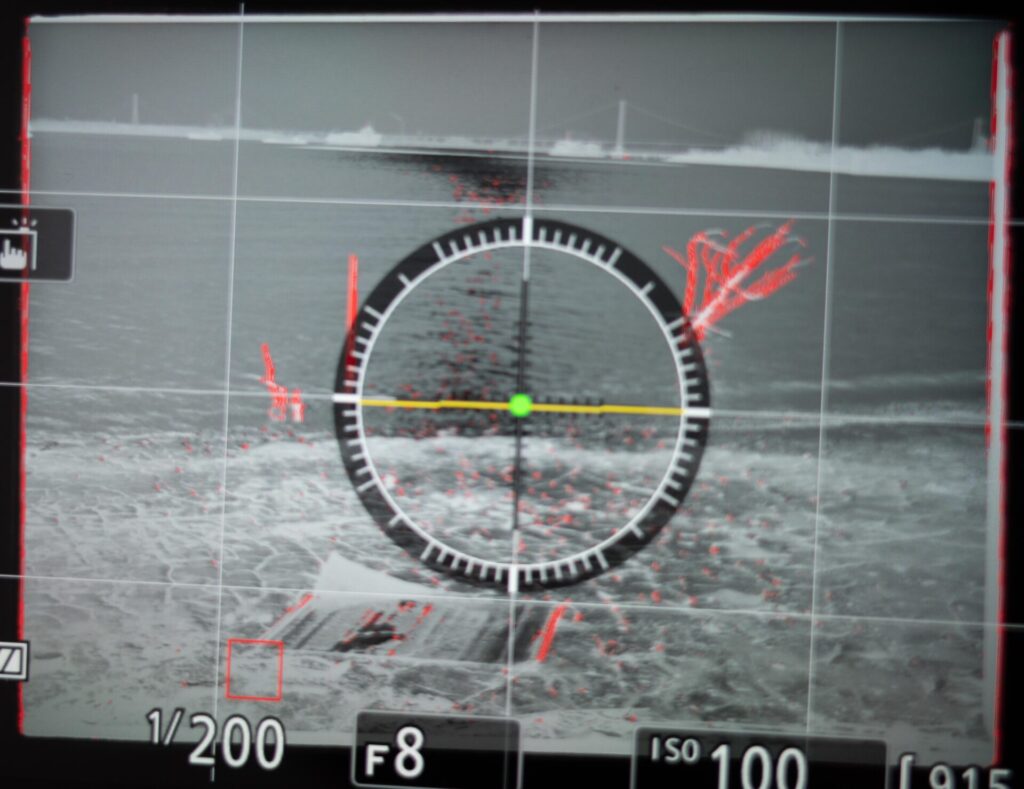
This is the back of my Nikon z6 screen. I am using focus peaking as I will be manually focusing on each frame before I record it.By using manual focus and focusing peaking, this looks to be in focus but it is not perfectly in focus.
Focusing on the film can take some time to get right, and I highly recommend using manual focus here. What you need to do is remember that what you are focusing on is not the image, but the film. You want to zoom into the film negative as much as possible and adjust the focus until the actual grain of the film is sharp. Remember that the image is already recorded onto the film emulsion and you want to digitize the emulsion. You can’t fix a soft image in the digitizing process.
I have found that the focal plane for this is very small and it needs to be checked each time you change the slide. If you don’t zoom into the grain each time and just rely on focus peaking or autofocus, you might not be getting the best results. I have found that autofocus is not good at this. Each time I tried it, I found that the grain was not in perfect focus.
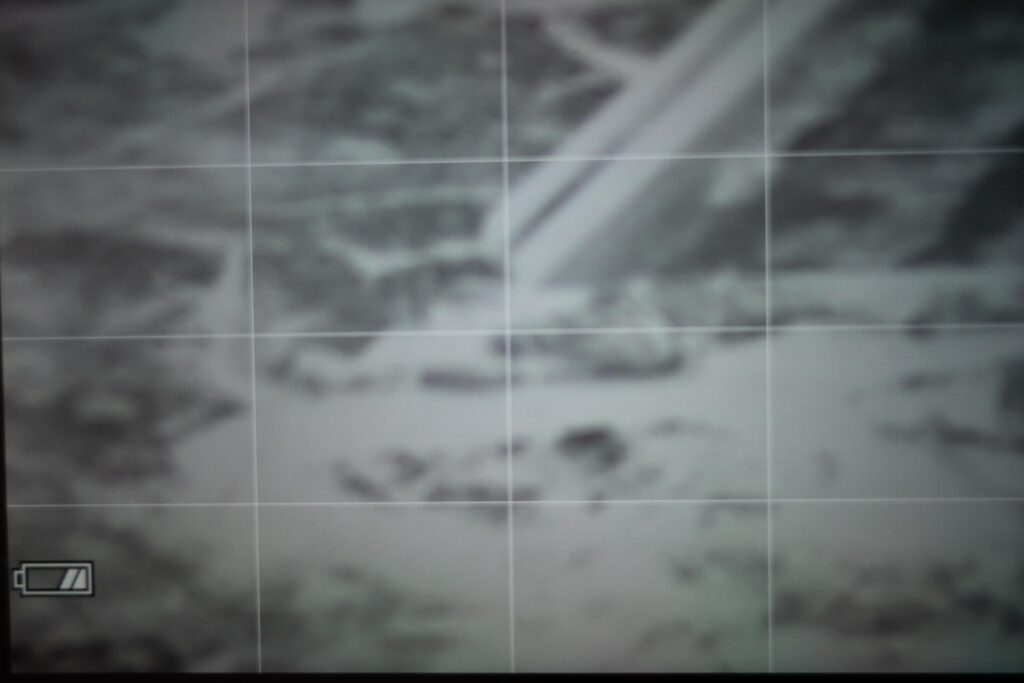
This is the maximum zoomed-in image on the back of the Nikon z6. This is from the previous image with focus peaking. Before zooming in, it looked to be in focus. You had the red focus peaking dots all around the screen, but at maximum magnification, it is clearly soft.
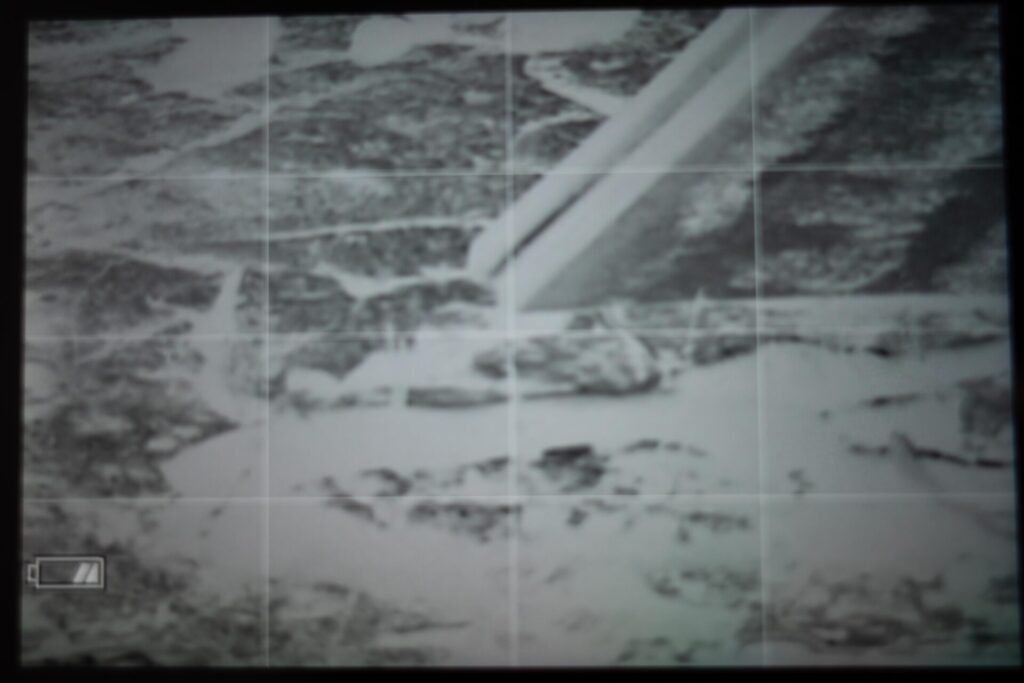
By adjusting the focus ever so slightly, the image comes into focus and you can see the grain on the emulsion very easily. This is critical to do. Make sure you focus on the grain of the emulsion, not the image that you see.
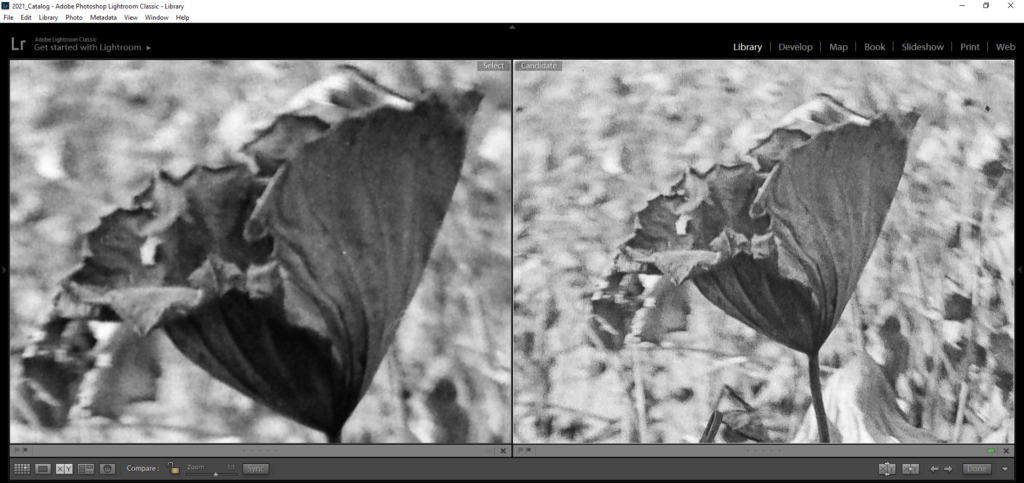
Once all the film slides have been digitized, you simply need to import the raw files into your photo editor of choice and then invert them. Inverting the image is really simple. This time, I will demonstrate how to do it in Lightroom.
I digitized a whole roll of 645 film in around 2 minutes. That included manually focusing on the grain for each image and adjusting the frames when they didn’t align perfectly.
I cropped and aligned all the images up using the crop tool. So all the images are ready to be inverted.
Inverting the image is fairly easy. Just drag the black point on the bottom left to the top left of the image curve, and do the same for the white point, except you drag the white point from the top right corner to the bottom right corner.
To invert the image this time, I will use the curve function in Lightroom.
I dragged the bottom left point (the black point) all the way up to the top of the curve box. This should produce a perfectly white image at this stage.
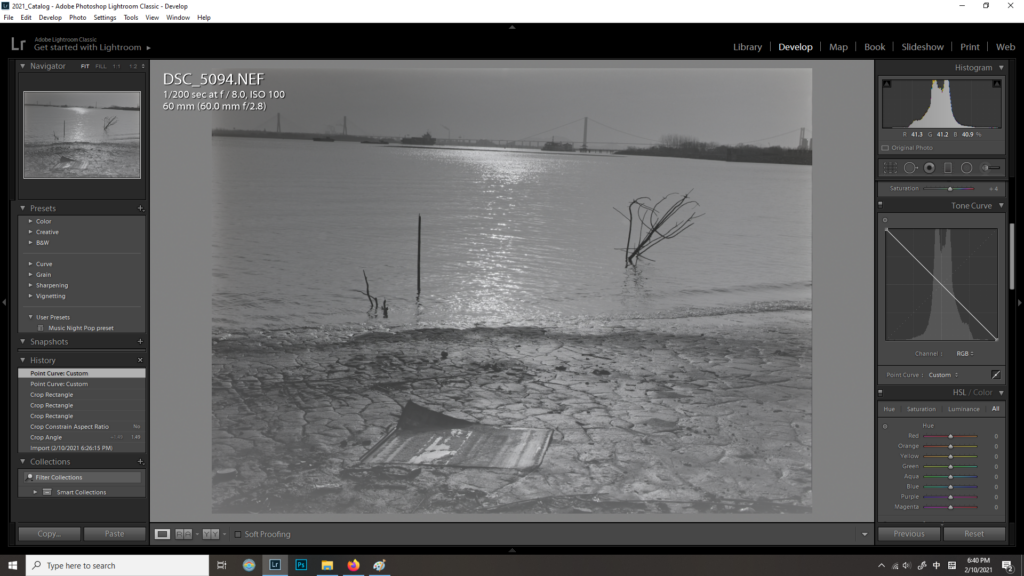
The second step is to grab the white point, the top left corner of the curve box, and drag it down to the bottom of the curve box. This inverts the negative into a positive shot which you are then free to edit.
All the negatives are converted. This took me less than 2 minutes to convert all the images. Doing it this way does have one problem though, and that is with all your controls for editing the images. By inverting the image, all your controls work in the opposite direction. So if you want to add more contrast, you need to reduce contrast in Lightroom.
Usually, your image is a little flat once you have done this. But you are now free to edit the image to get your desired results. One of the more difficult parts about inverting a film negative is that your controls usually work in reverse now, so if you want to brighten an image, then you need to lower the exposure. This is not very intuitive, so what I usually do is export the file to Photoshop so I can do some cleaning up of the image, like removing dust spots or small scratches, and save the results. Once you are back in Lightroom, you can edit the image normally.
A quick edit of all the images. When you invert the images, they can lack some contrast, so that is where I start with the edit. After that I go to shadows and blacks and end with sharpening up the image.
Let us look at some examples and see how this way of converting your medium format negatives is far superior to any flatbed scanner. I will provide 8 samples this time, which is a lot, but when I was looking for information about this topic, I found nothing on the internet. Hopefully, this will help someone.
examples
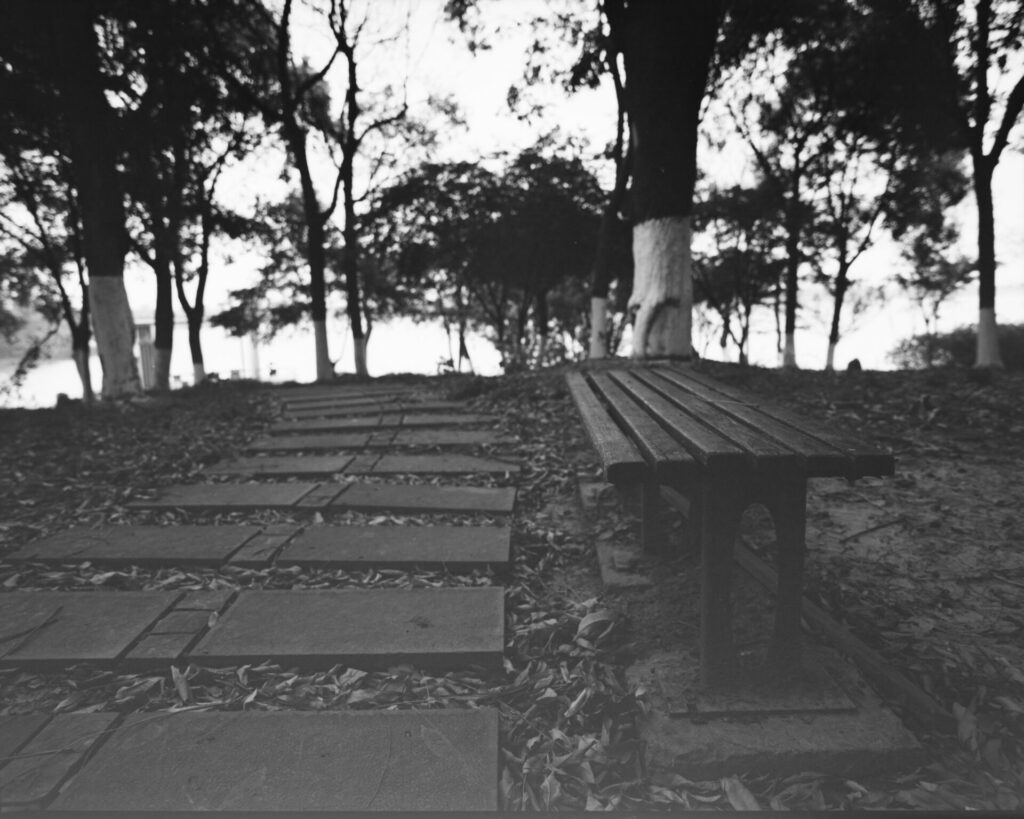
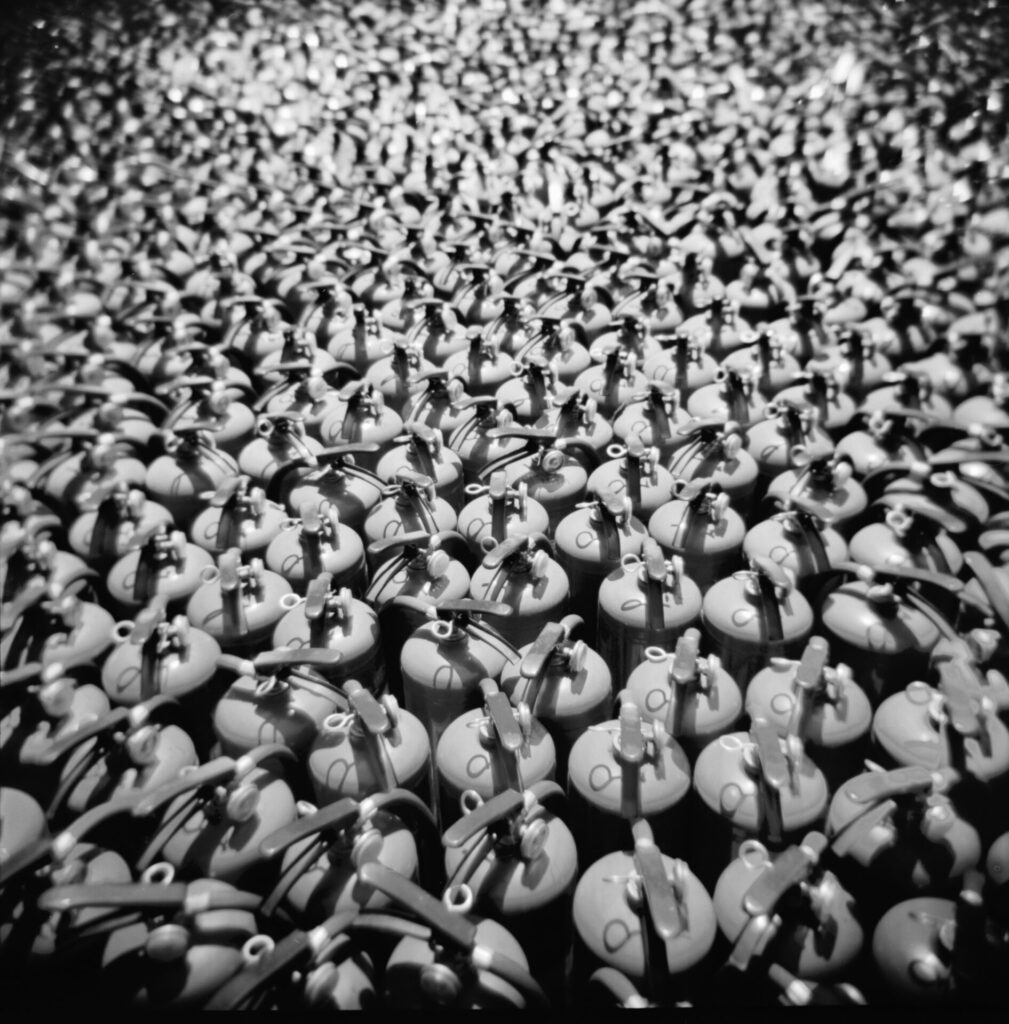
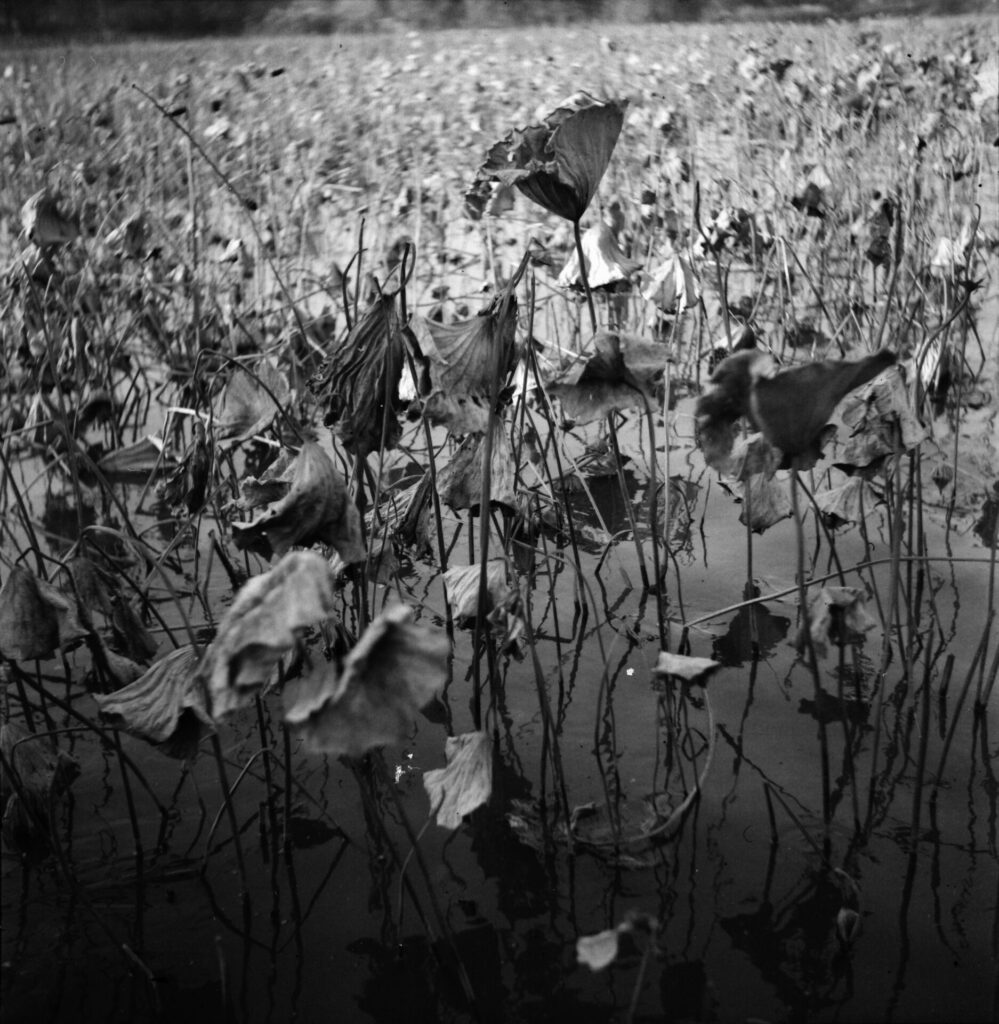
Canon CanoScan 9000F Mark II Scan
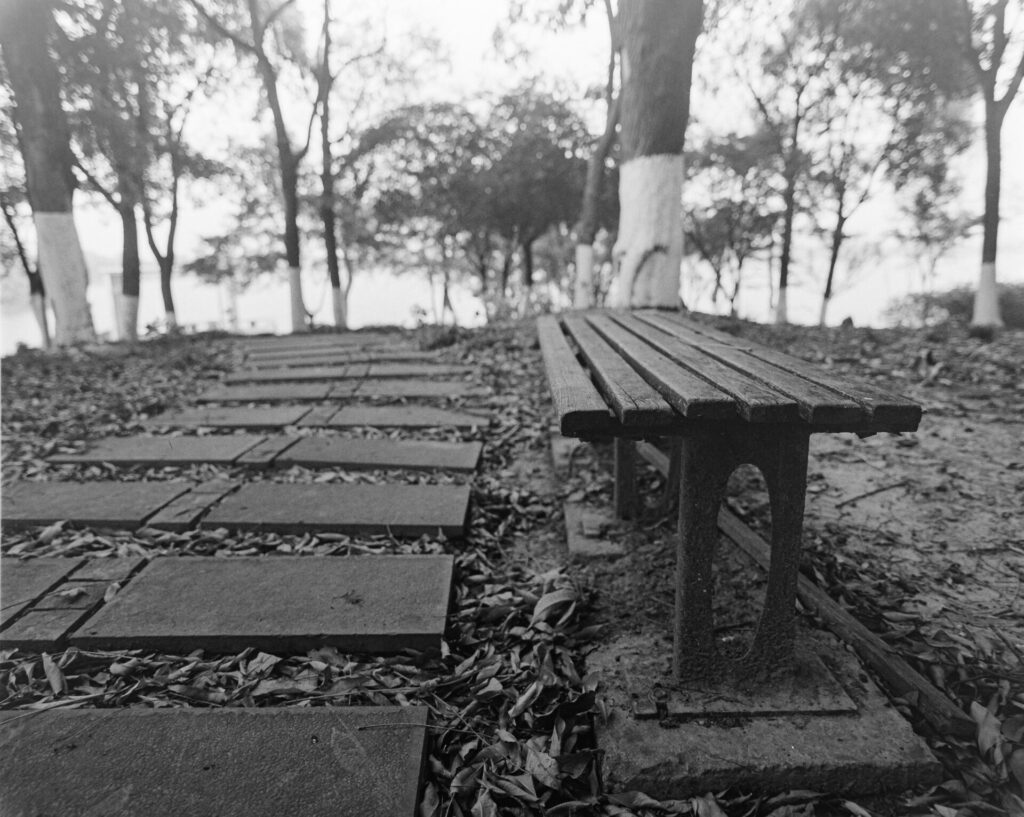
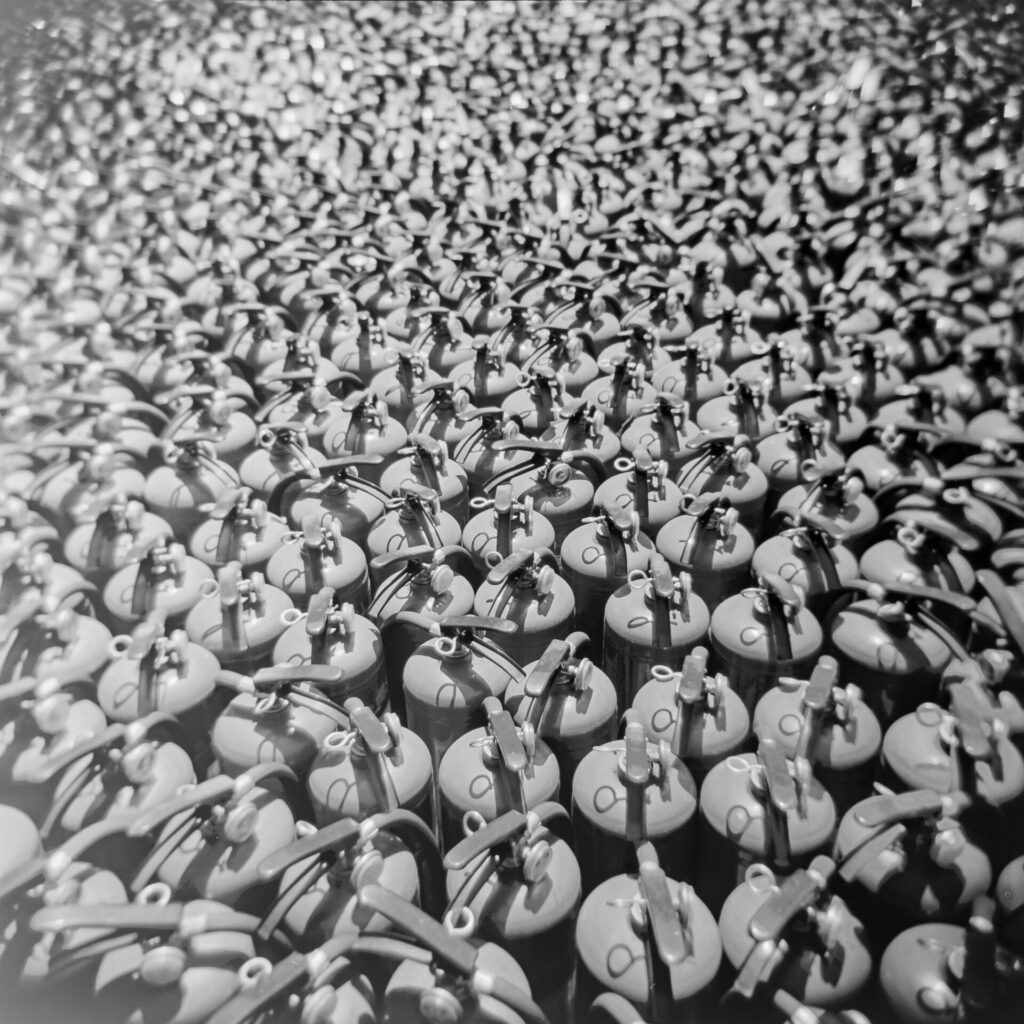
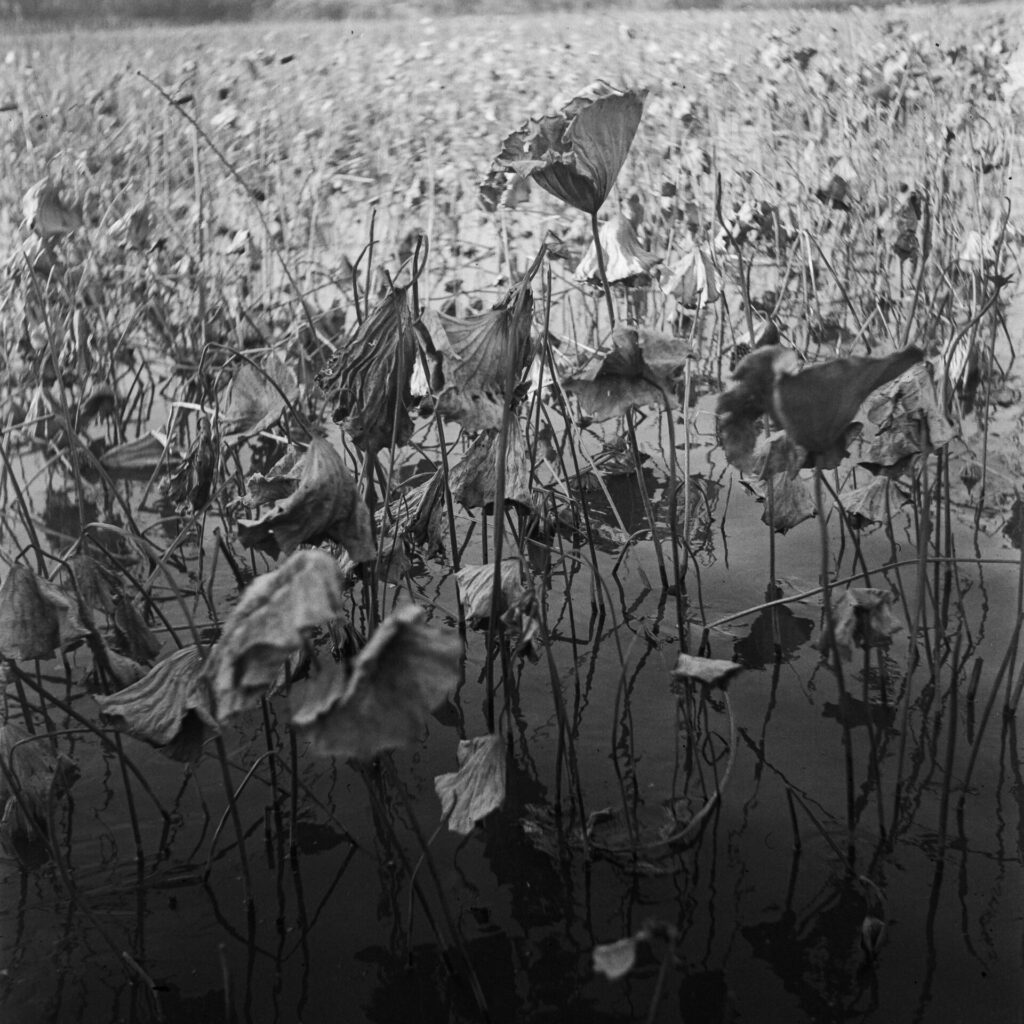
The Nikon Z6 scan with the Camflix adaptor.
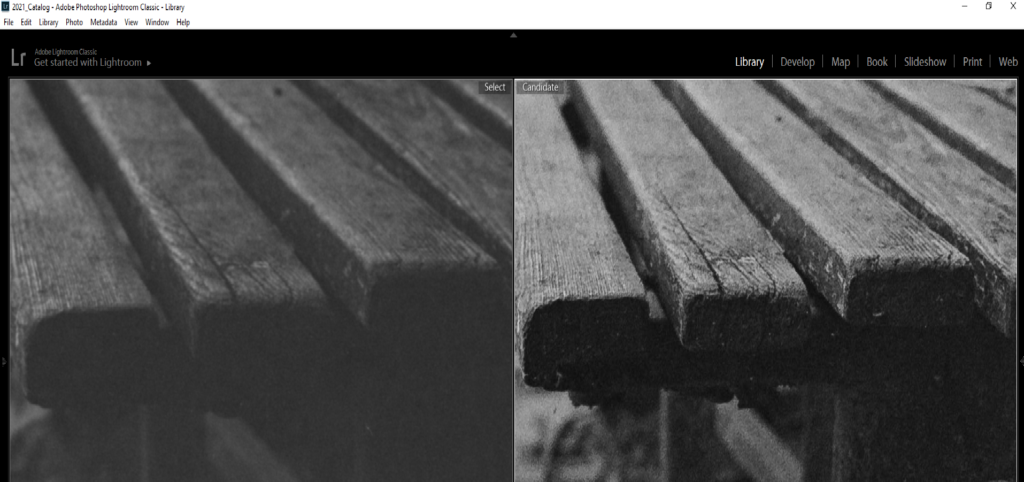
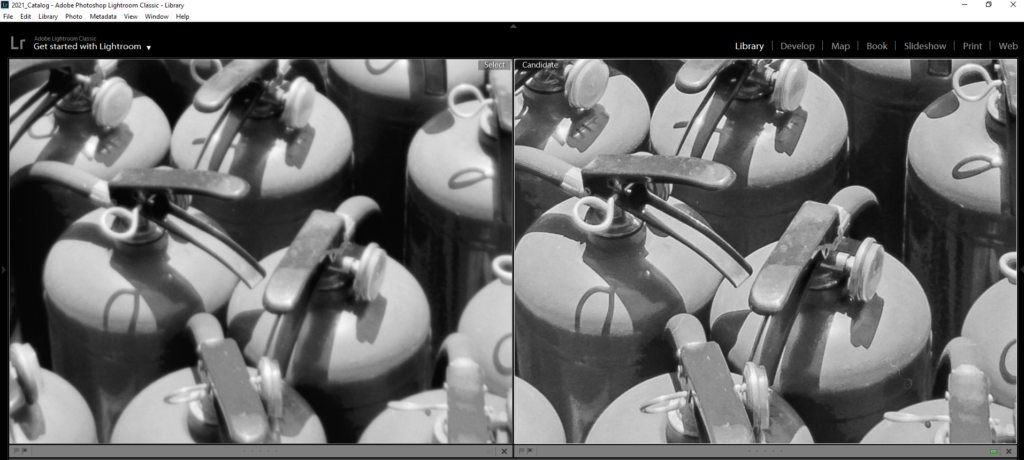
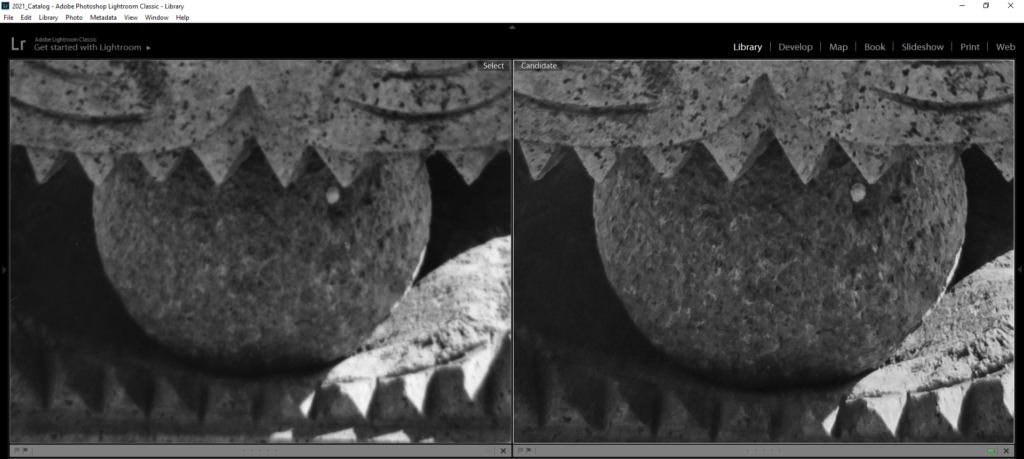
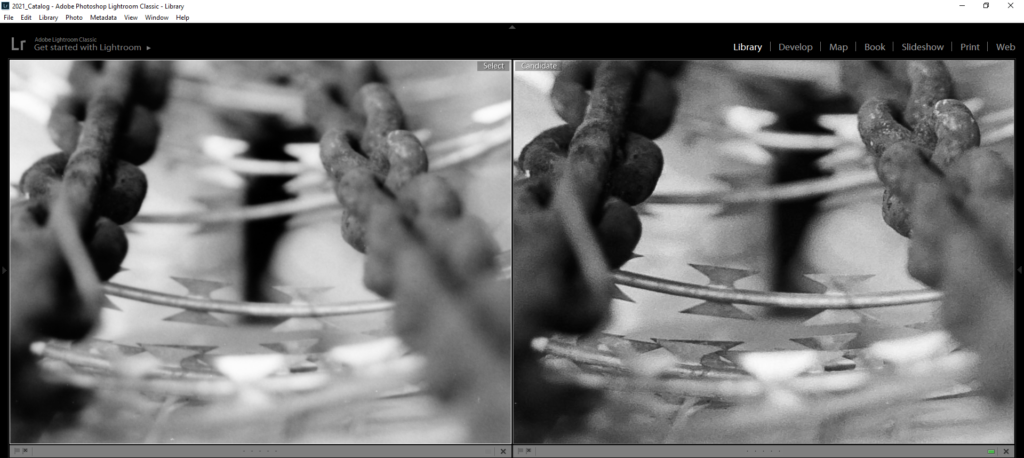
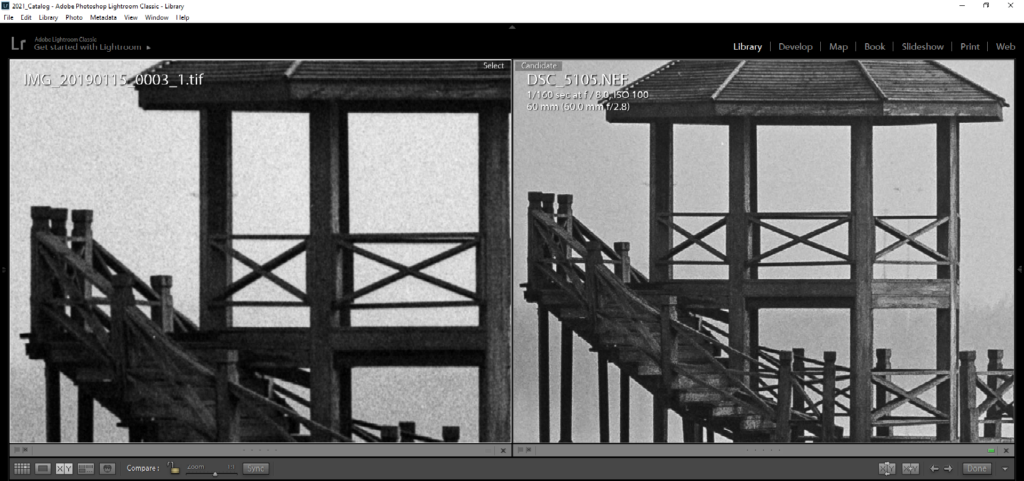
1:1 crops from each scan with the Canon CanoScan 9000 being on the left and the Camflix scan on the right. You can see how much extra detail is in the Nikon Z6 and Camflix adapter shoot.
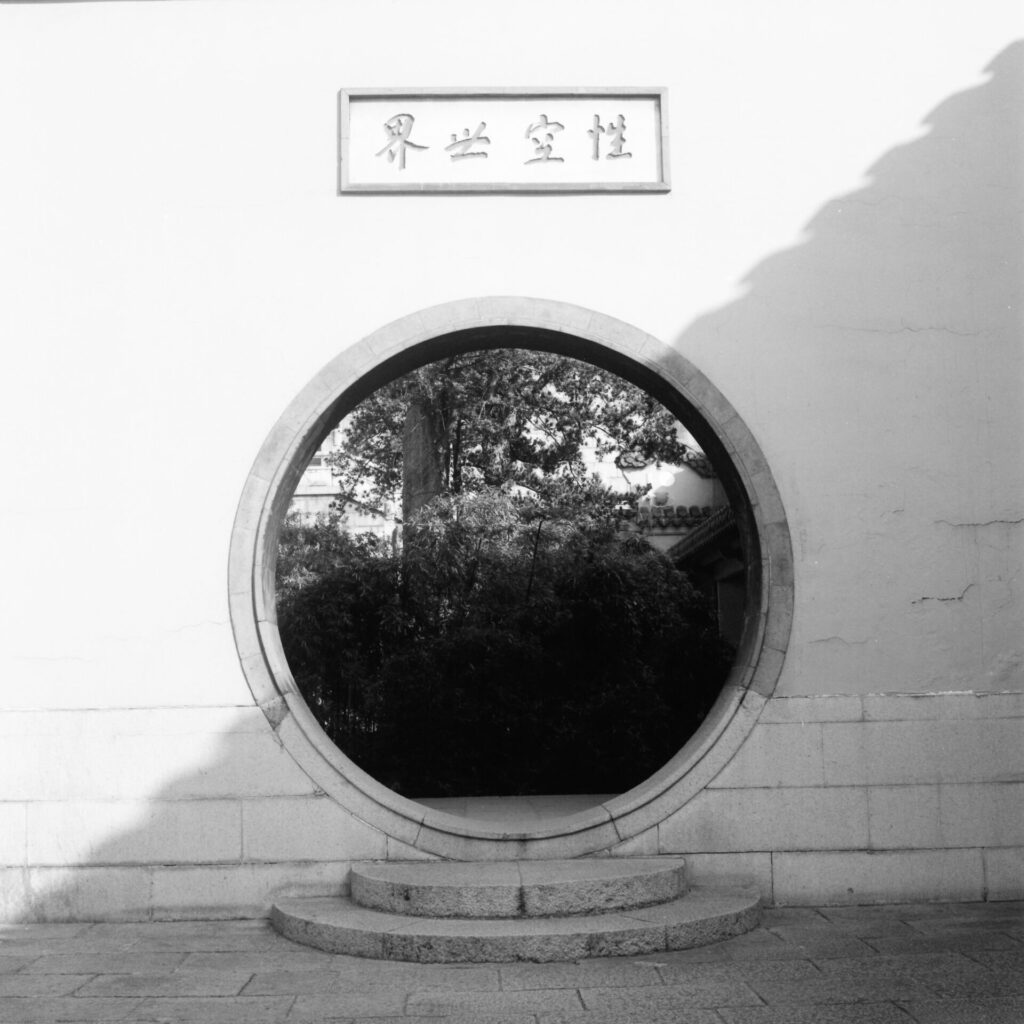
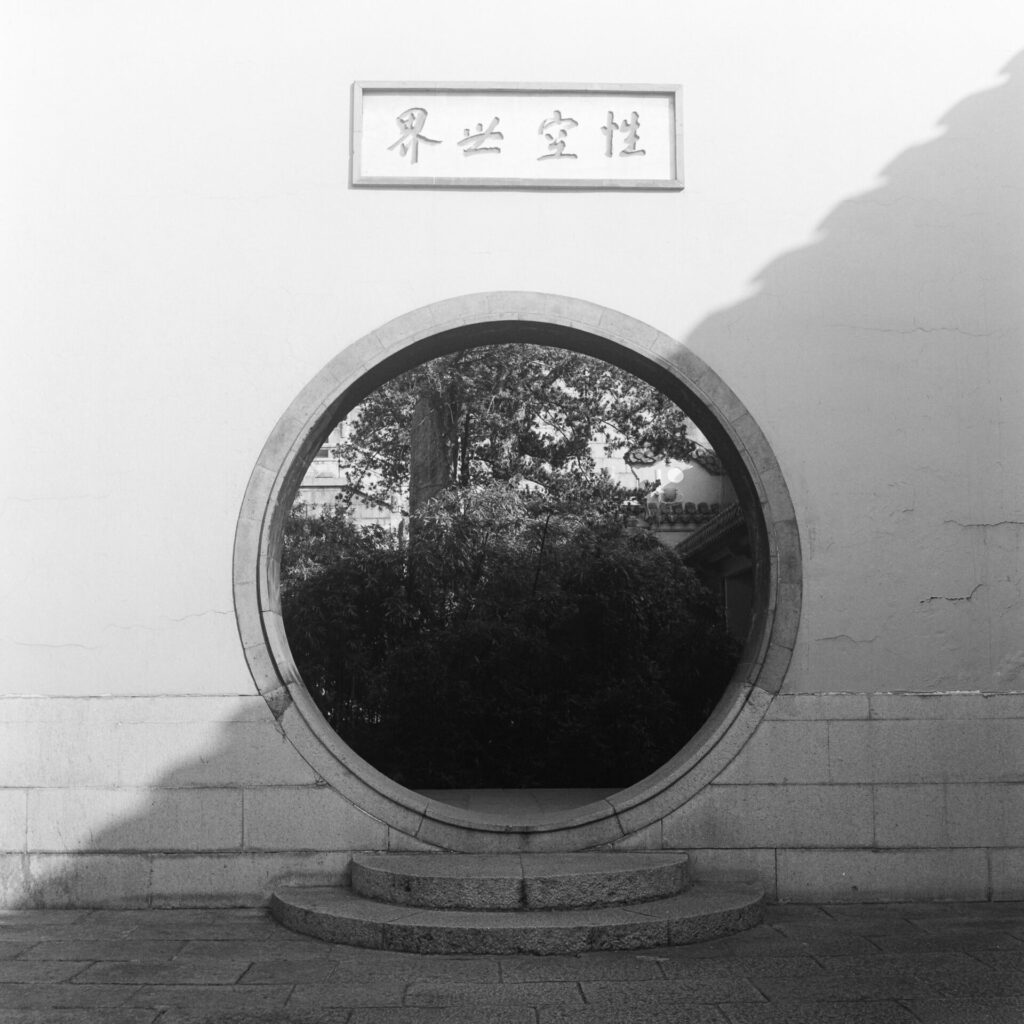
This first shot was from my Yashica Mat 124G and I always liked this shot but I was never happy with the scan. At the time I was not sure if the lens was slightly soft or if the scan was bad. When I look at the scan from the Camflix, there is so much more detail in the image. The detail in the wall is easy to see, the leaves on the tree are much clearer now and not so mushy. The whole image just looks better. I found these same results in nearly all the examples so I won’t comment much on each example unless something is interesting that I think you should look at.
Canon CanoScan 9000F Mark II Scan
The Nikon Z6 scan with the Camflix adaptor.
1:1 crops from each scan with the Canon CanoScan 9000 being on the left and the Camflix scan on the right. You can clearly see how much extra detail is in the Nikon Z6 and Camflix adapter shoot.
Overall the image is much sharper and has more detail. This was a shot from my Pentax 67.
Canon CanoScan 9000F Mark II Scan
The Nikon Z6 scan with the Camflix adaptor.
1:1 crops from each scan with the Canon CanoScan 9000 being on the left and the Camflix scan on the right. You can see how much extra detail is in the Nikon Z6 and Camflix adapter shoot. It is crazy how sharp the Holga lens can be when you get a good scan of a negative.
A shot from my Holga.
Canon CanoScan 9000F Mark II Scan

The Nikon Z6 scan with the Camflix adaptor. notice the weird vignette on the top left side of the image. Not sure what it came out like that but if this was an image I planned to post somewhere and not just an example for this review, I would edit that corner to look much better.
1:1 crops from each scan with the Canon CanoScan 9000 being on the left and the Camflix scan on the right. You can see how much extra detail is in the Nikon Z6 and Camflix adapter shoot.
The most interesting thing about this shot is the vignette in the top right corner. The negative from the Nikon Z6 looked a little weird compared to the flatbed scanner. I would definitely fix that in Photoshop, but the rest of the negative is clearly much sharper than the flatbed scanner.
Canon CanoScan 9000F Mark II Scan

The Nikon Z6 scan with the Camflix adaptor.
1:1 crops from each scan with the Canon CanoScan 9000 being on the left and the Camflix scan on the right. You can see how much extra detail is in the Nikon Z6 and Camflix adapter shoot. I think it is easy to see the difference in detail and sharpness that you get with a macro lens.

Canon CanoScan 9000F Mark II Scan
The Nikon Z6 scan with the Camflix adaptor.
1:1 crops from each scan with the Canon CanoScan 9000 being on the left and the Camflix scan on the right. You can see how much extra detail is in the Nikon Z6 and Camflix adapter shoot. This is one of the few shots that I found not much difference between the two images.
This is one example where I didn’t find much difference between the flatbed scanner and the Camflix shot. There is more detail in the shadow areas, but not a huge difference compared to the other images. I was shooting some cheap Shanghaifilm for this shot, so this might have caused the lack of resolution—who knows? I find a lot of the Chinese film manufacturers to be very inconsistent with their film rolls. Some rolls are great, and some rolls of film are terrible.
Canon CanoScan 9000F Mark II Scan
The Nikon Z6 scan with the Camflix adaptor.

1:1 crops from each scan with the Canon CanoScan 9000 being on the left and the Camflix scan on the right. You can clearly see how much extra detail is in the Nikon Z6 and Camflix adapter shoot.
Look at how much more detail is captured in the shadow area in the negative.
Canon CanoScan 9000F Mark II Scan
Notice the white dust post here on the flatbed scanner. But It is not found on the Nikon Z6 and Camflix shot. The negative was cleaned for both shots so I think the dust must have been on the glass of the flatbed scanner.
The Nikon Z6 scan with the Camflix adaptor.
1:1 crops from each scan with the Canon CanoScan 9000 being on the left and the Camflix scan on the right. You can clearly see how much extra detail is in the Nikon Z6 and Camflix adapter shoot.
Overall, I think the results that I get from the Camflix film digitizer are great. This is what I expected when I started to shoot medium format. With the flatbed scanner, the results were always terrible. I ended up avoiding my medium format cameras for a long time because I was getting better results with my Plustek Scanner than I was getting from a 6×7 negative with the flatbed scanner, which is completely crazy. So the Camflix film digitizing system will help me a lot with my goal of shooting a lot more medium format film in 2021.
But not everything is perfect when it comes to digitizing your film this way. Getting colors to be accurate by inverting them in Lightroom would be extremely frustrating unless you were using a plugin like Negative Lab Pro. The plugin works great, but since I mostly shoot black and white film, I don’t need to use it. However, if you shoot color, definitely look at this as it will save you hundreds of hours of work.
The second problem you will face comes from dust and scratches on the film. I check each and every single frame for dust and hair. There is nothing I can do about the scratches except fix them in Photoshop, but I can make sure there is no dust and hair on the negative before I digitize the frame. There is nothing worse than spending time in Photoshop, editing out dust spots.
In the past, I would shoot around 10 rolls of 35mm to each roll of 120 because I always got better results from my 35mm scans with the Plustek scanner. I am hoping to reverse this trend this year and shoot as much medium format film as possible. Since I purchased the Camflix digitizing system, I have disconnected my flatbed scanner and I don’t use it anymore. Scanning film used to be a nightmare that took forever, but it is a simple and fast process now. I will never buy another flatbed scanner again, and I simply keep my old Canon Canoscan to digitize documents that I must sign for work.
The Camflix system has replaced my flatbed scanner now. I will only keep the flatbed scanner for digitizing documents for work.
The final thing I want to quickly go over with regards to the Camflix digitizer—and this applies to all film digitizing in general—is that the resolution of each negative now purely depends on the camera you are using. My Nikon Z6 has a 24-megapixel sensor, so if I upgrade to a higher megapixel camera in the future, I could get higher-resolution captures of my negatives. This doesn’t mean that the negatives will become better, just that the digitization of the negatives will contain more detail. What is recorded in the emulsion cannot be changed, but there is something you can do to improve a negative: HDR. If you have a negative with extremely high dynamic range, you could easily shoot three shots and combine them using HDR to capture more detail from the file. I haven’t tried this as I shoot black and white and tend to crush the shadows in my shots anyway, but it’s something to consider if you are shooting color.
I am sure you would get better results by using a drum scanner compared to the Camflix system, but those cost an arm and a leg. Even getting a single frame drum scanned is not cheap and almost impossible for me to do in China.
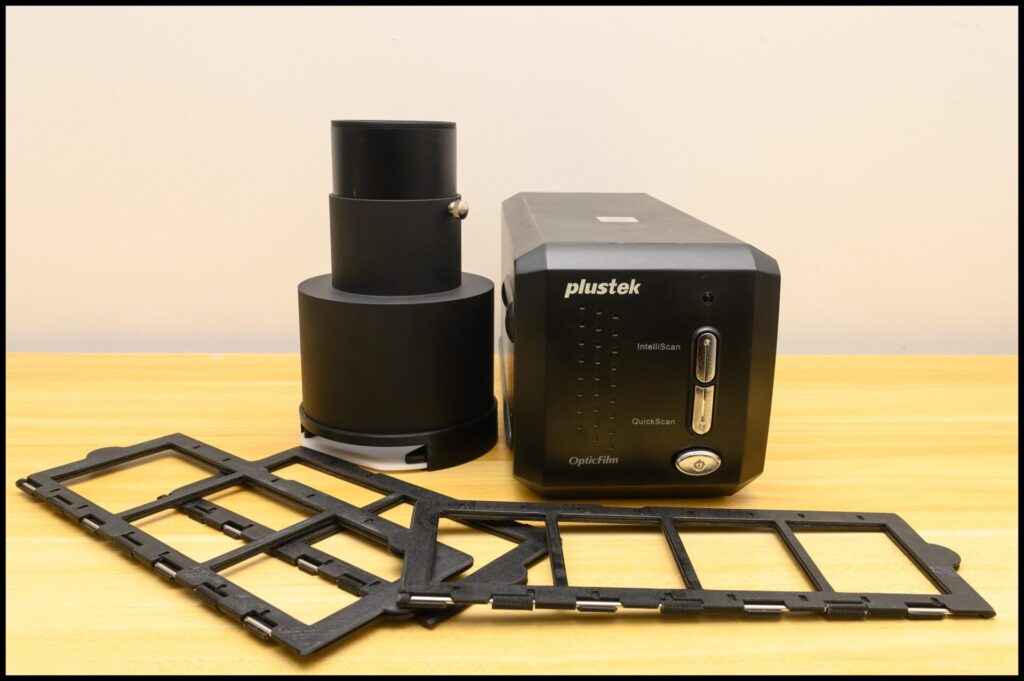
This is my setup for scanning now. The Camflix system for medium format and the Plustek for 35mm.
The Camflix system is a great buy for any film shooter, in my opinion, as it speeds up your workflow and gives you much better results than a flatbed scanner. The only downside to the Camflix system is that it is actually pretty expensive for what you get. I think I paid the same amount of money for the basic Camflix kit with the 6×7 holder as I did for the Canon CanoScan 9000F Mark II scanner, but I think that is far better in the quality of the results that it produces. If you want to get into digitizing your medium format negatives then I would highly recommend that you purchase the Camfix film digitizer, and you can pick up the different film holders such as 645, 6×6, or even 135mm, and digitize everything with your camera. If I had not bought the Nikon ES-2 Film Digitizing Adapter already, I would have bought the 135mm film holder for the CamFix unit and had the complete collection but I am not into wasting my money and I still using the Plustek scanner with the 35mm negatives because it does produce better results. I am sure a dedicated 120mm Plustek scanner would give better results than what you can get out of the Camfix system and a macro lens, but those machines cost thousands of dollars so I am perfectly happy digitizing my film this way.
I am not going to give scores on reviews anymore because I think scores are mostly useless in the end. I will simply say that I am very happy with my purchase, and I plan to keep using the Camflix film digitizing system in the future. The Camflix system restored my faith in medium format film photography by showing me how good medium format shots can be when they are digitized correctly. For that, I will always be very grateful to Camflix and their product.
Shaun